High Level
Regardless of your choice of image-generation inference server, models, or extensions, the basic process is as follows:- Get a docker image that runs your inference server
- Copy any models and extensions you want into the docker image
- Ensure the container is listening on an ipv6 address
- Push the new image up to a container registry
- Deploy the image as a SaladCloud container group
Find a Docker Image
Find a docker image of ComfyUI. Here’s one we’ve verified works on Salad: ComfyUI- Git Repo: ComfyUI API
- Docker Image: ghcr.io/saladtechnologies/comfyui-api:comfy0.3.27-torch2.6.0-cuda12.4-runtime
- Model Directory:
/opt/ComfyUI/models - Custom Node Directory:
/opt/ComfyUI/custom_nodes/
Download Your Models and Extensions
We’re going to use the Flux1-schnell model, at 8-bit precision. You can download it here. We’re using theschnell version because it’s the fastest, and it has a license allowing for commercial use. We’re using this
convenient fp8 checkpoint because it runs well on consumer gpus, and allows for a simpler workflow in ComfyUI.
Create a Dockerfile
- Create a new file called
Dockerfileand open it in your preferred text editor. At this point, your directory should look like this:
- Save an API-Formatted workflow.json file in the same directory as your Dockerfile. This file will be used to warm up the server before starting it. You can generate this file by using the ComfyUI web interface to create a prompt, and then saving it in API format. See below for more details.
- Copy the following into your Dockerfile:
/prompt API to allow either
receiving the generated images in the response body, or having complete images submitted to a provided webhook url.
Build and Test Your Docker Image
- Build the docker image. You should change the specified tag to suit your purpose.
-
(Recommended) Run the docker image locally to confirm it works as expected
Using it here locally, we’re going to expose port 3000, which is required for the wrapper, and port 8188 that will let us access the web ui locally to make it easier to get the prompt object we need for the api.
-
Go to http://localhost:8188/ in your browser. You should see something like this:

-
Drag in this image to populate the workflow.
Taken from the ComfyUI documentation


-
Click “Queue Prompt” to generate an image. The first image should be identical to the one we used to populate
the workflow, because they use the same seed. If you generate another image, it should be different. Here’s
mine.

-
Enable Dev Mode Options via the settings menu


- Click the “Save (API Format)” button, and save it. You’ll get a file called “workflow_api.json” that contains everything ComfyUI needs to run that prompt again.
-
Go to http://localhost:8188/ in your browser. You should see something like this:
-
Submit the prompt to the wrapper API on port 3000, using Postman or any http request tool of your choice.

http://127.0.0.1:3000/promptwith a JSON request body like this, where the value of “prompt” is that workflow json we created previously. -
In a couple seconds you should receive a response like this:
-
Decode the base64 encoded string into your image. You can do this in a free browser tool such as https://codebeautify.org/base64-to-image-converter

jqandbase64. For this method, first save your response to a file calledresponse.json. Then, run the following command:
Push and Deploy Your Docker Image
- Push your docker image up to docker hub (or the container registry of your choice.)
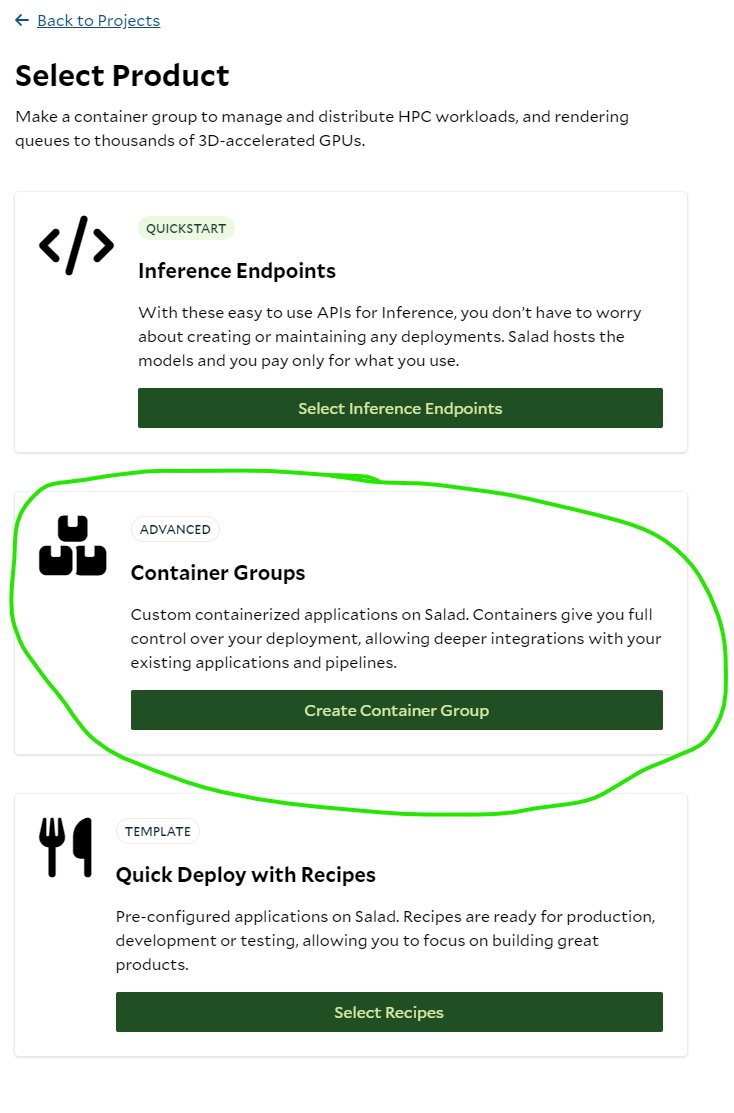
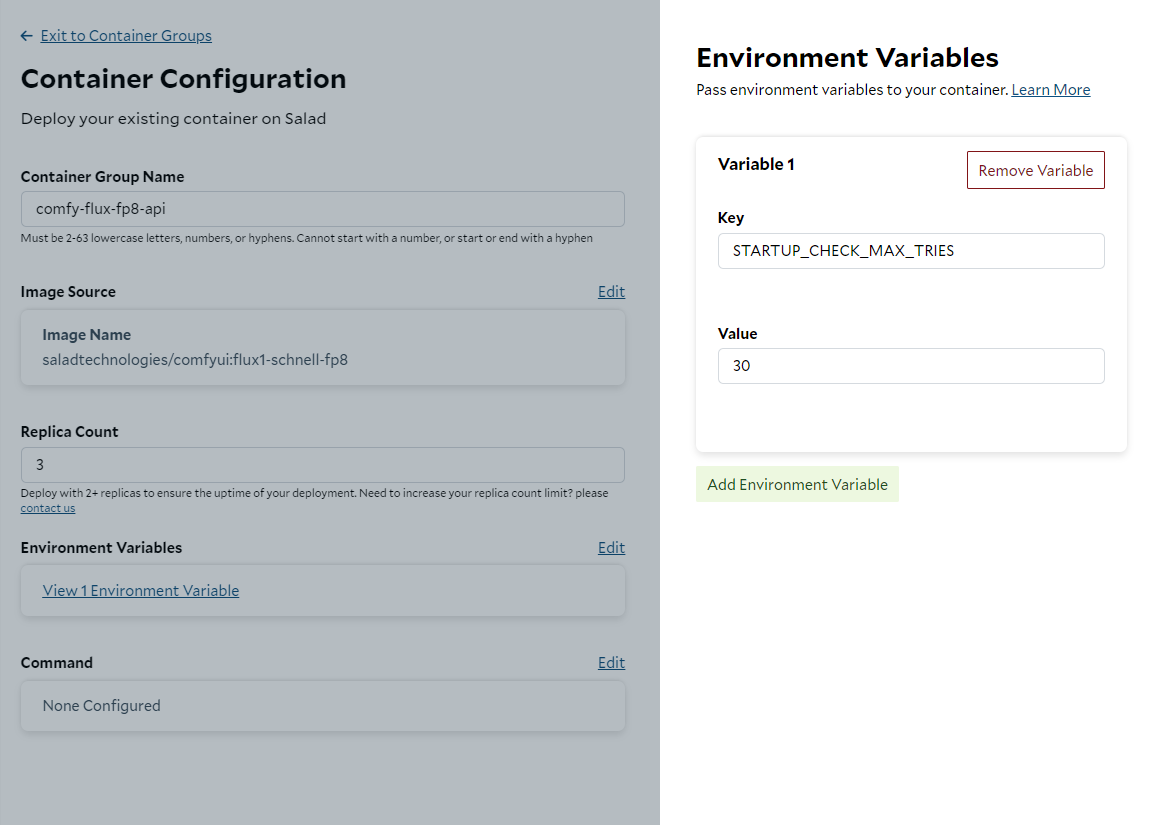
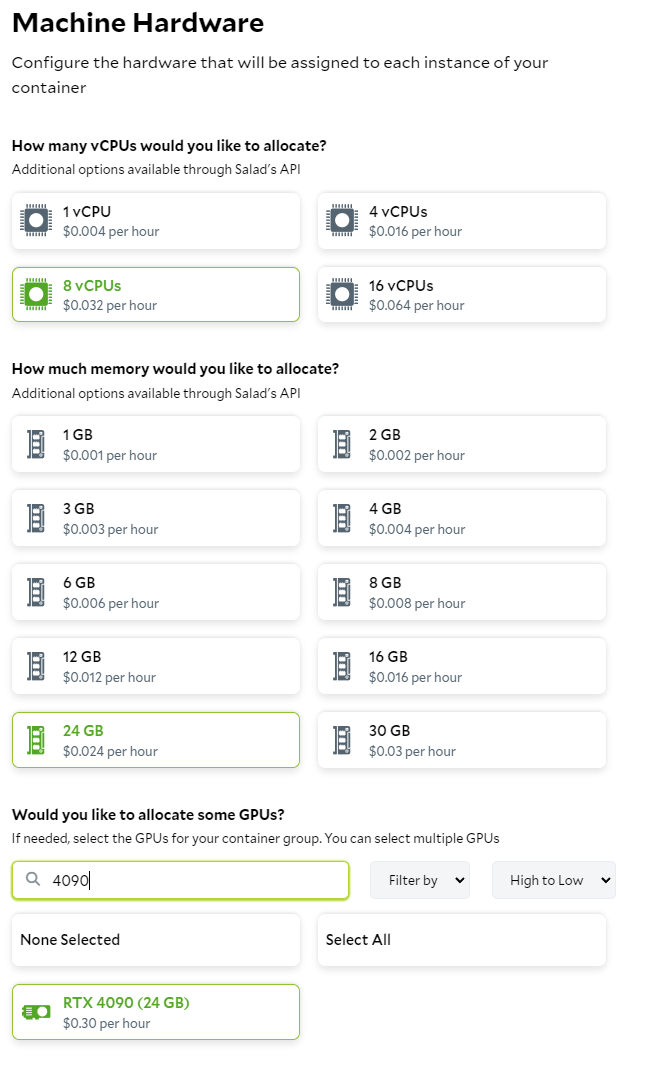
- Deploy your image on Salad, using either the Portal or the SaladCloud Public API
Salad-Api-Key header.
Interact with Your Deployment
-
Wait for the deployment to be ready.
-
First, SaladCloud pulls your container image into our own internal high-performance cache.

-
Next, SaladCloud begins downloading the cached container image to the nodes that have been assigned to your
workload.
 This step can take tens of minutes in
some cases, depending on the size of the image, and the internet speed of the individual nodes. Note that our
progress bars are only estimates, and do not necessarily reflect real-time download status. These slow cold
starts, and the possibility of nodes being interrupted by their host without warning, are why we always want to
provision multiple replicas.
This step can take tens of minutes in
some cases, depending on the size of the image, and the internet speed of the individual nodes. Note that our
progress bars are only estimates, and do not necessarily reflect real-time download status. These slow cold
starts, and the possibility of nodes being interrupted by their host without warning, are why we always want to
provision multiple replicas.
-
Eventually, you will see instances listed as “running”, with a green check in the “ready” column.

-
First, SaladCloud pulls your container image into our own internal high-performance cache.
-
Submit your prompt to the provided Access Domain Name. You will get back a json response within a few seconds. See
above for how to submit the request and process the response.
