Introduction

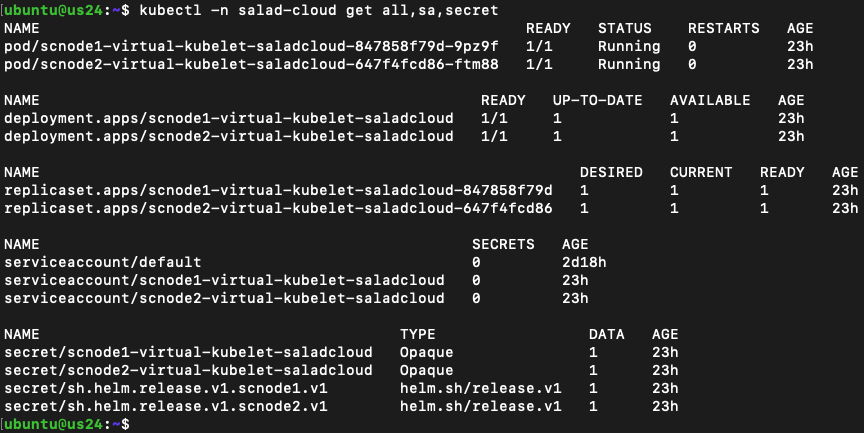
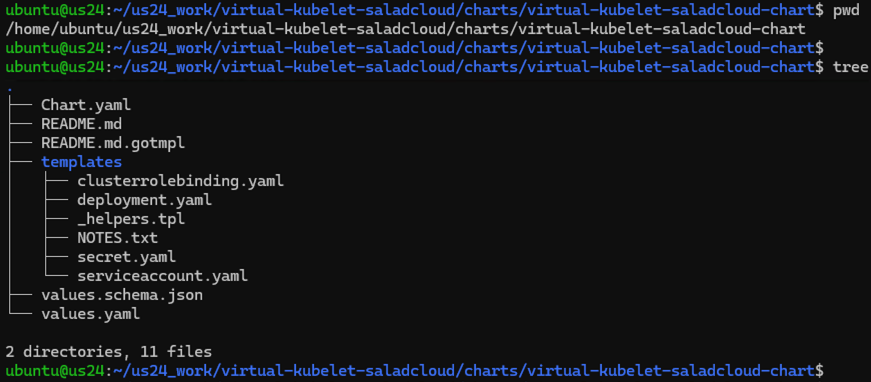
The easiest way to install a Salad VK instance into your Kubernetes cluster is by using the provided Helm chart. This will deploy the VK instance as a single-pod deployment, along with other necessary resources, such as a service account, secret and cluster role binding within the designated namespace. By using different instance names, the Helm chart allows multiple VK instances to be installed within a single namespace, ensuring that one can be safely removed without affecting the others. Alternatively, you can create a dedicated namespace for each VK instance to enhance resource isolation and management. Here is an example of the deployed resources for two VK instances, scnode1 and scnode2, within the salad-cloud namespace: By default, Helm also creates a secret to store release information for each chart deployment. The cluster role binding is a cluster-wide resource and is not associated with any specific namespace. In this example, the two service accounts for the two VK instances are assigned the system:node ClusterRole.

Perform a Dry Run and Install

Before deploying the chart, you can perform a dry run and check the generated Kubernetes YAML manifests without applying them to the cluster. First, define the following environment variables using your SaladCloud account details, including your organization name, project name and API key:
export SALAD_API_KEY=************
export SALAD_PROJECT_NAME=************
export SALAD_ORGANIZATION_NAME=************
If you’re still using the legacy UUID-based API key, you will need to create a new style API key for the Salad VK provider, which will start with salad_cloud_user_. Additionally, make sure to create a dedicated, empty project on SaladCloud for each VK instance. Then run the helm template command to pull the chart (0.2.3) hosted on the OCI registry at GitHub Container Registry (GHCR) and render the chart with the above environment variables:
helm template scnode3-dryrun oci://ghcr.io/saladtechnologies/virtual-kubelet-saladcloud-chart --version 0.2.3 \
  --create-namespace \
  --namespace salad-cloud \
  --set salad.apiKey=$SALAD_API_KEY \
  --set salad.organizationName=$SALAD_ORGANIZATION_NAME \
  --set salad.projectName=$SALAD_PROJECT_NAME \
  --set salad.nodeName=scnode3
It is highly recommended to provide a unique node name (e.g., scnode3) for each VK instance deployment. If the node name is not specified, a default name in the format saladcloud-node-xxx with a random suffix will be automatically applied. Now, install the chart using the helm install command. Helm follows the same kubeconfig precedence as kubectl, and the cluster-admin or equivalent permissions are required to install the chart.
helm install scnode3 oci://ghcr.io/saladtechnologies/virtual-kubelet-saladcloud-chart --version 0.2.3 \
  --create-namespace \
  --namespace salad-cloud \
  --set salad.apiKey=$SALAD_API_KEY \
  --set salad.organizationName=$SALAD_ORGANIZATION_NAME \
  --set salad.projectName=$SALAD_PROJECT_NAME \
  --set salad.nodeName=scnode3
If the salad-cloud namespace exists, Helm will use it without creating a new one. If the namespace doesn’t exist, Helm will create it automatically with the —create-namespace flag. You can also clone the Salad VK project from the GitHub repository to your local machine and customize the chart as needed. For example, you may add resource constraints for the VK pod, such as CPU and memory limits and requests, or assign a custom role for the service account. Then install your customized chart:
helm install scnode3 ./charts/virtual-kubelet-saladcloud-chart \
  --create-namespace \
  --namespace salad-cloud \
  --set salad.apiKey=$SALAD_API_KEY \
  --set salad.organizationName=$SALAD_ORGANIZATION_NAME \
  --set salad.projectName=$SALAD_PROJECT_NAME \
  --set salad.nodeName=scnode3

Troubleshooting

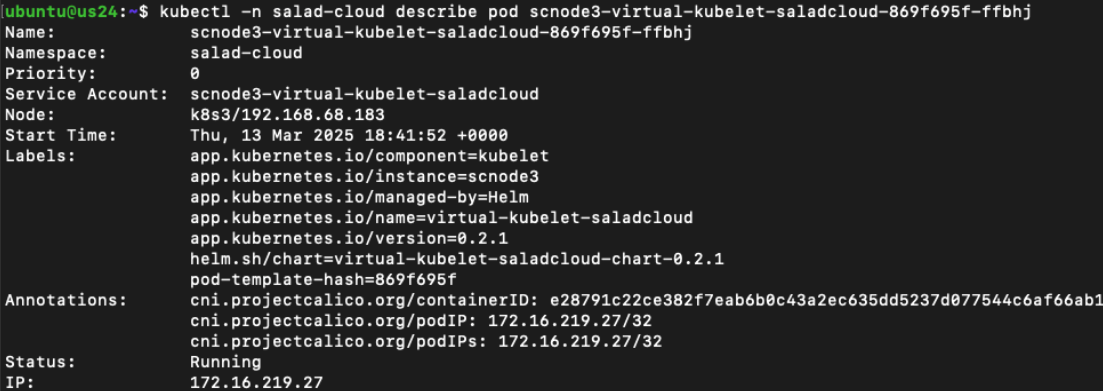
The scnode3 node should become ready shortly after deploying the chart. If any issues arise, you can retrieve detailed resource information, running state and check logs for troubleshooting:
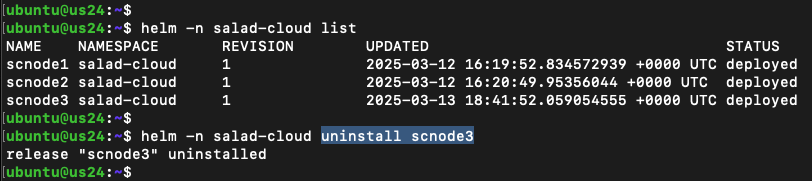
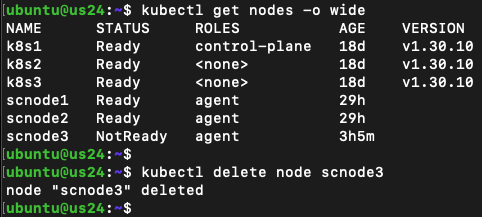
 The warning msg in the logs is expected and can be ignored, as the Salad VK provider doesn’t run an HTTP server.

Uninstall

Before uninstalling a VK instance, make sure that no virtual pods are running on the virtual node. Then, you can list the installed releases in the namespace and uninstall the chart: Now, remove the node from the Kubernetes cluster:

Common Commands

# Troubleshooting

kubectl get nodes -o wide
kubectl describe node scnode1

kubectl -n salad-cloud get all,sa,secret
kubectl -n salad-cloud get all,sa,secret | grep scnode1
kubectl get clusterrolebinding | grep salad

kubectl -n salad-cloud describe pod <VK_NODE_POD_NAME>
kubectl -n salad-cloud logs <VK_NODE_POD_NAME> -f

# Install and Uninstall

export SALAD_API_KEY=************
export SALAD_PROJECT_NAME=************
export SALAD_ORGANIZATION_NAME=************

helm -n salad-cloud list
helm -n salad-cloud status scnode1

helm template scnode3-dryrun oci://ghcr.io/saladtechnologies/virtual-kubelet-saladcloud-chart --version 0.2.3 \
  --create-namespace \
  --namespace salad-cloud \
  --set salad.apiKey=$SALAD_API_KEY \
  --set salad.organizationName=$SALAD_ORGANIZATION_NAME \
  --set salad.projectName=$SALAD_PROJECT_NAME \
  --set salad.nodeName=scnode3

helm install scnode3 oci://ghcr.io/saladtechnologies/virtual-kubelet-saladcloud-chart --version 0.2.3 \
  --create-namespace \
  --namespace salad-cloud \
  --set salad.apiKey=$SALAD_API_KEY \
  --set salad.organizationName=$SALAD_ORGANIZATION_NAME \
  --set salad.projectName=$SALAD_PROJECT_NAME \
  --set salad.nodeName=scnode3

helm -n salad-cloud uninstall scnode3

kubectl delete node scnode3