Managing Long-Running Tasks on SaladCloud with SQS
Managing long running tasks, such as molecular simulations, LoRA training, and LLM finetuning, presents unique challenges on SaladCloud, due primarily to the interruptible nature of nodes. At the core of all solutions to this problem are a job queue, and progress checkpoints. The job queue is responsible for distributing tasks to workers, and detecting when a worker has been interrupted. Workloads should save checkpoints of their progress and upload it to cloud storage, so that they can be resumed from the last checkpoint in the event of an interruption. Workers should also upload completed artifacts to cloud storage.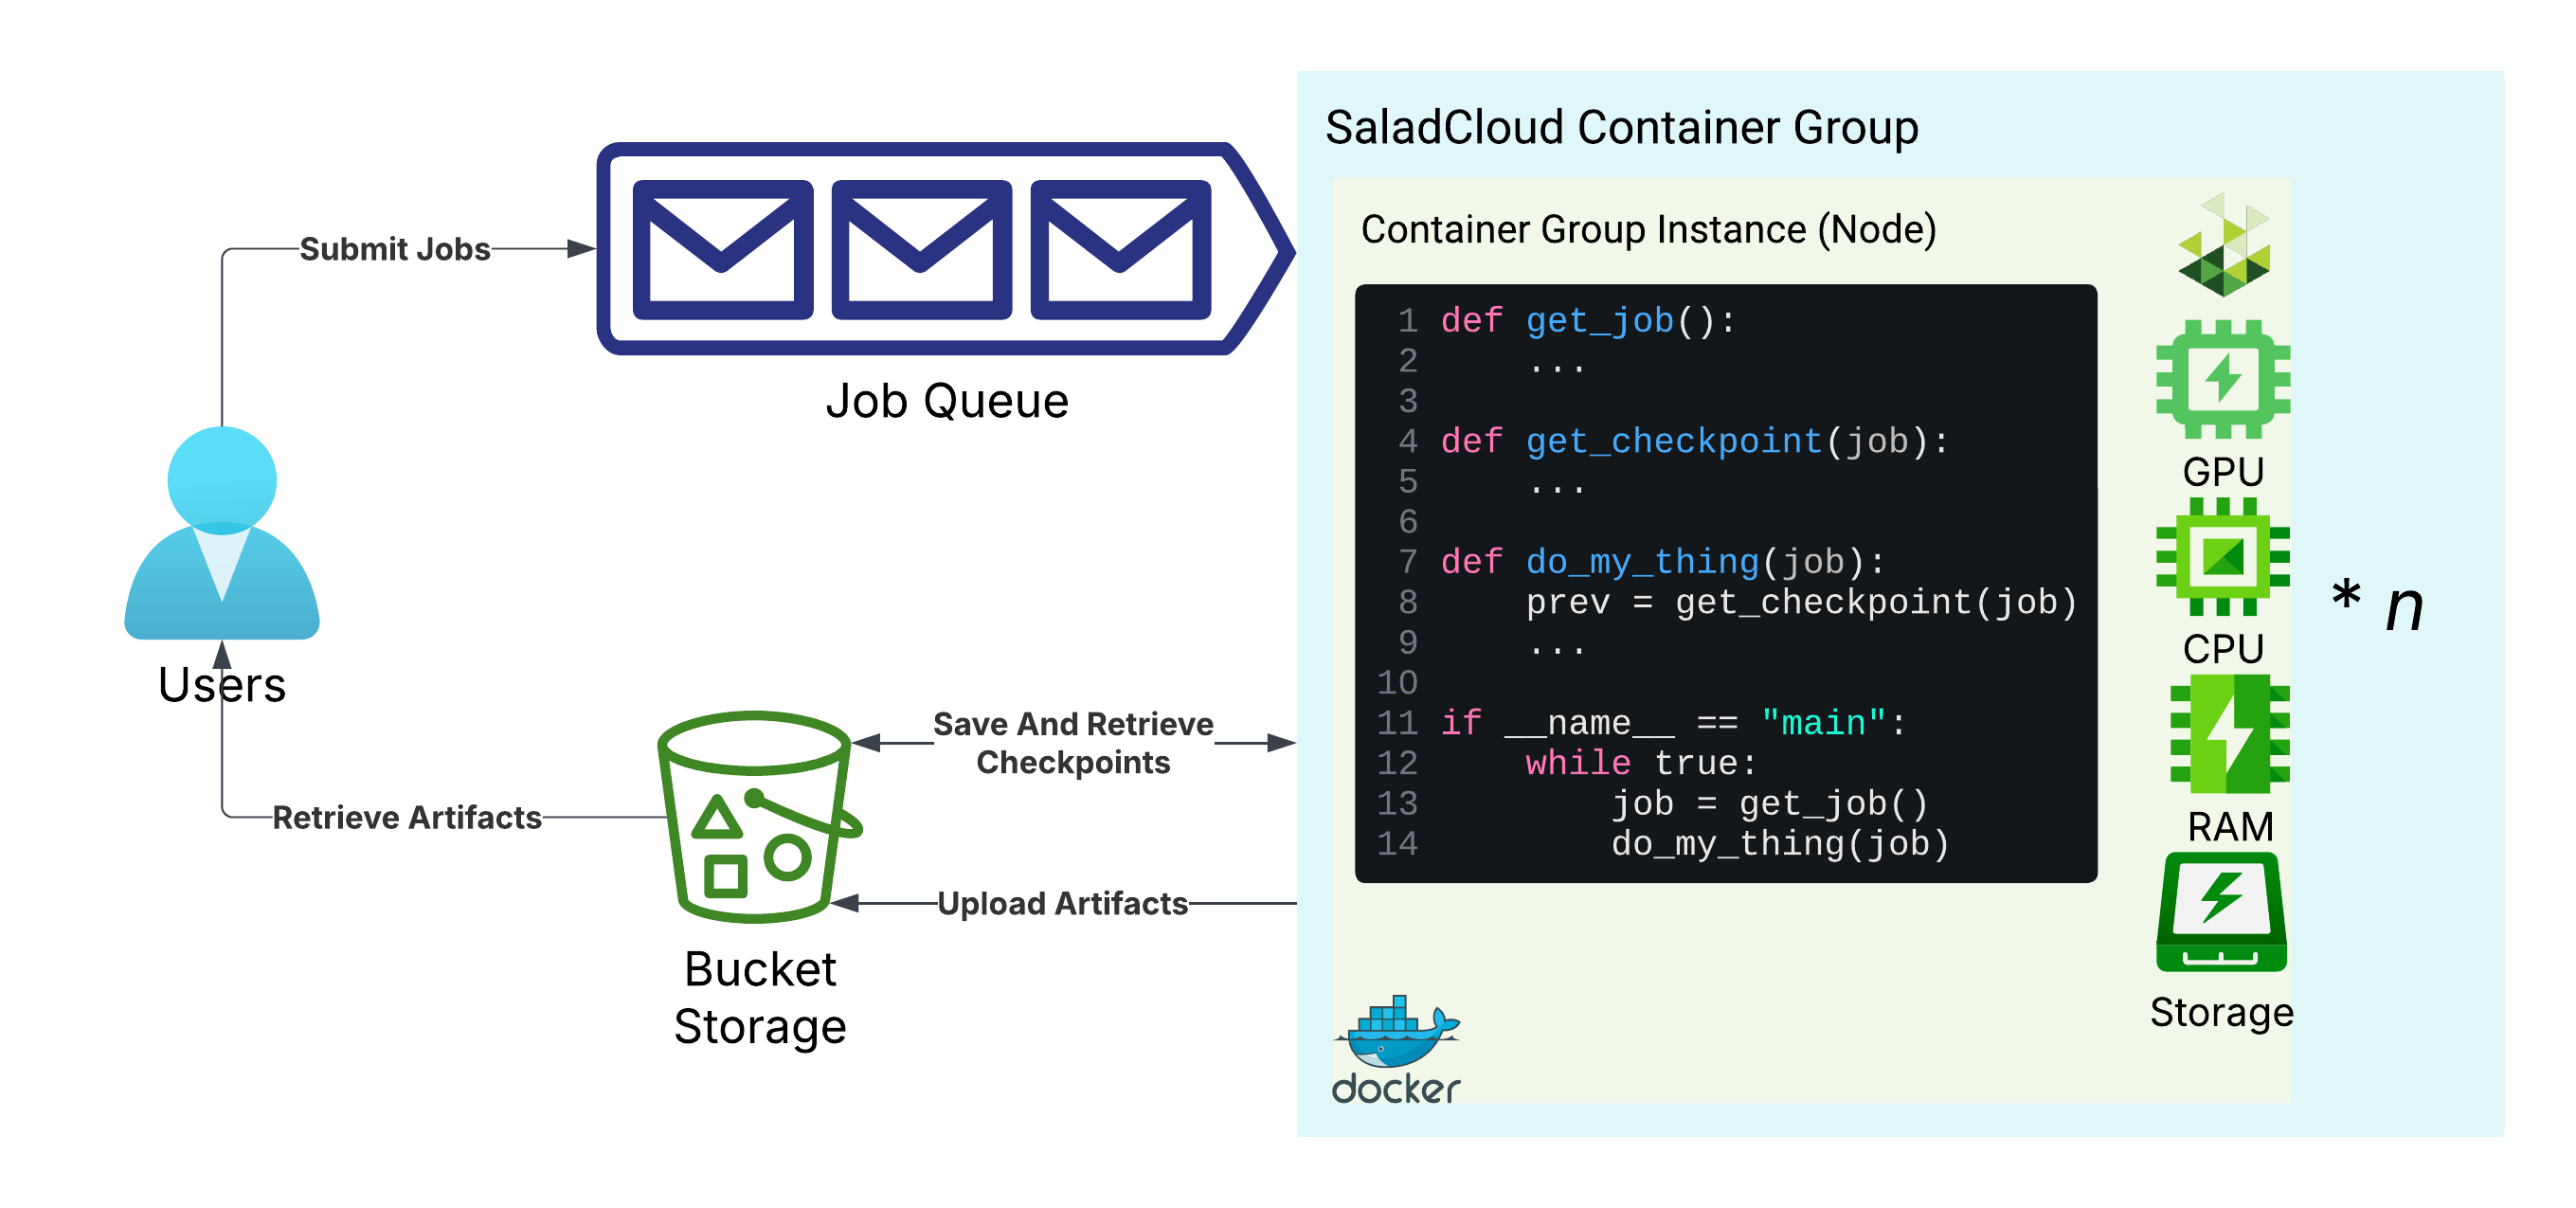
Basic architecture for long-running tasks on SaladCloud
IAM: Identity and Access Management
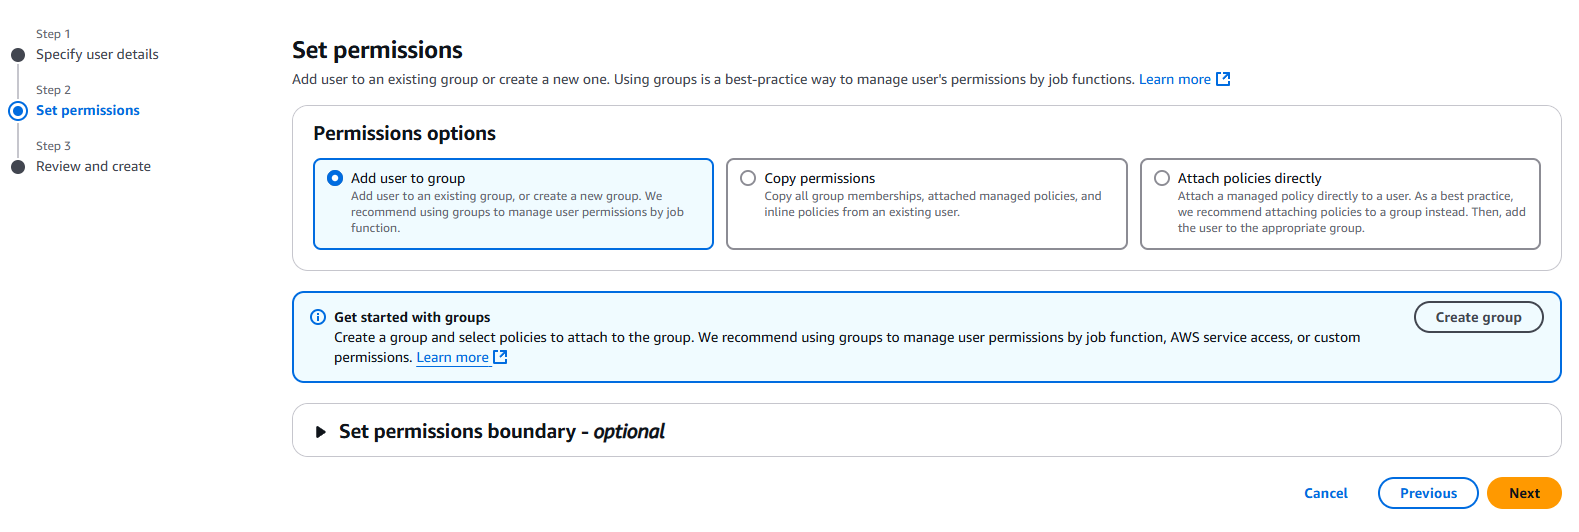
IAM is the AWS system for managing users, roles, and permissions. We will need to create two IAM users: one for us, the user submitting the jobs, and one for the workers. The user submitting the jobs will need to be able to submit jobs to the queue, and the workers will need to be able to read and delete jobs from the queue. To get started, navigate to the IAM console, and select “Users” from the left-hand menu. Click “Create User”.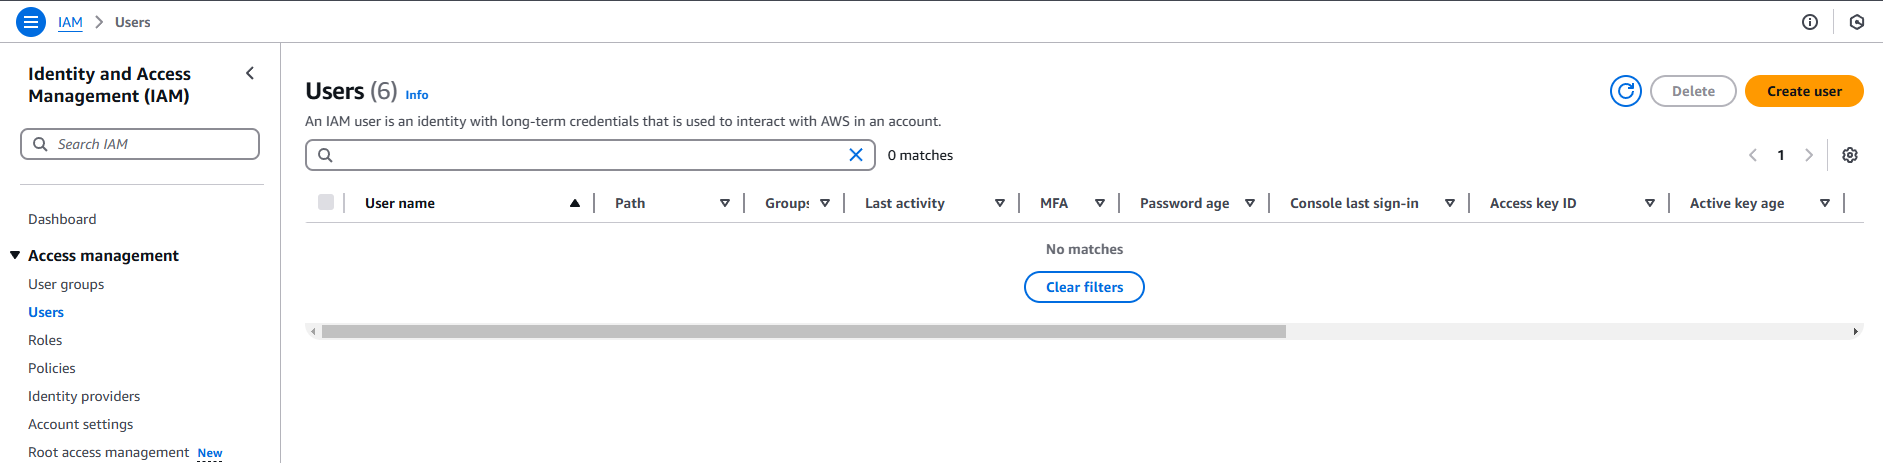
The IAM Users Console
job-submitter. It does not need console access.
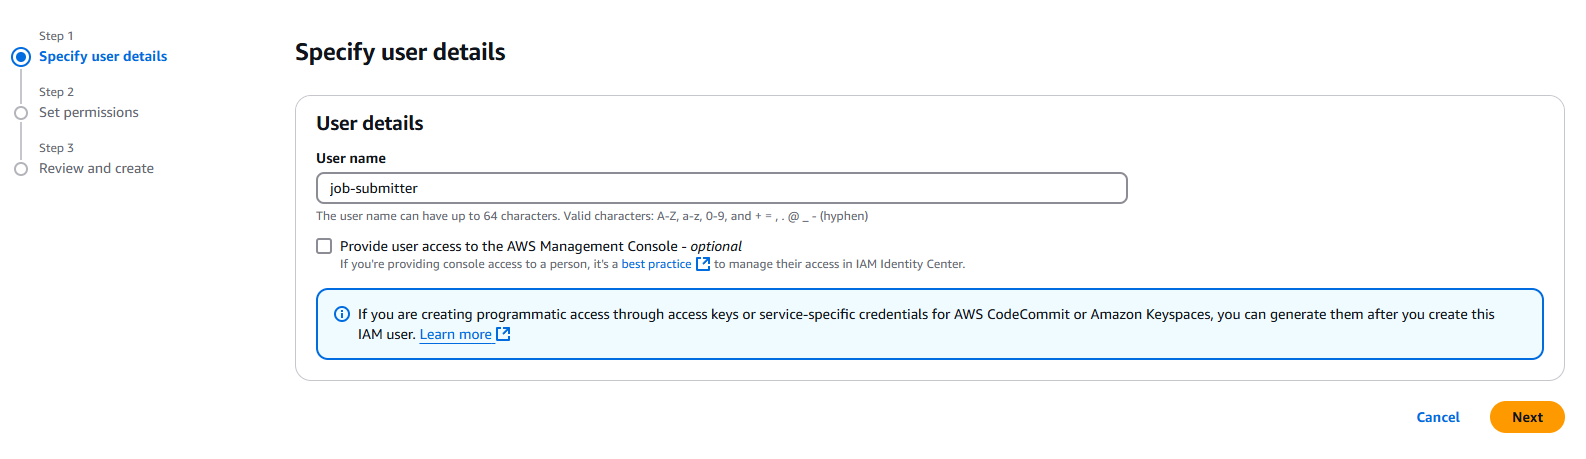
Creating the job-submitter user
Granting no permissions to the job-submitter user
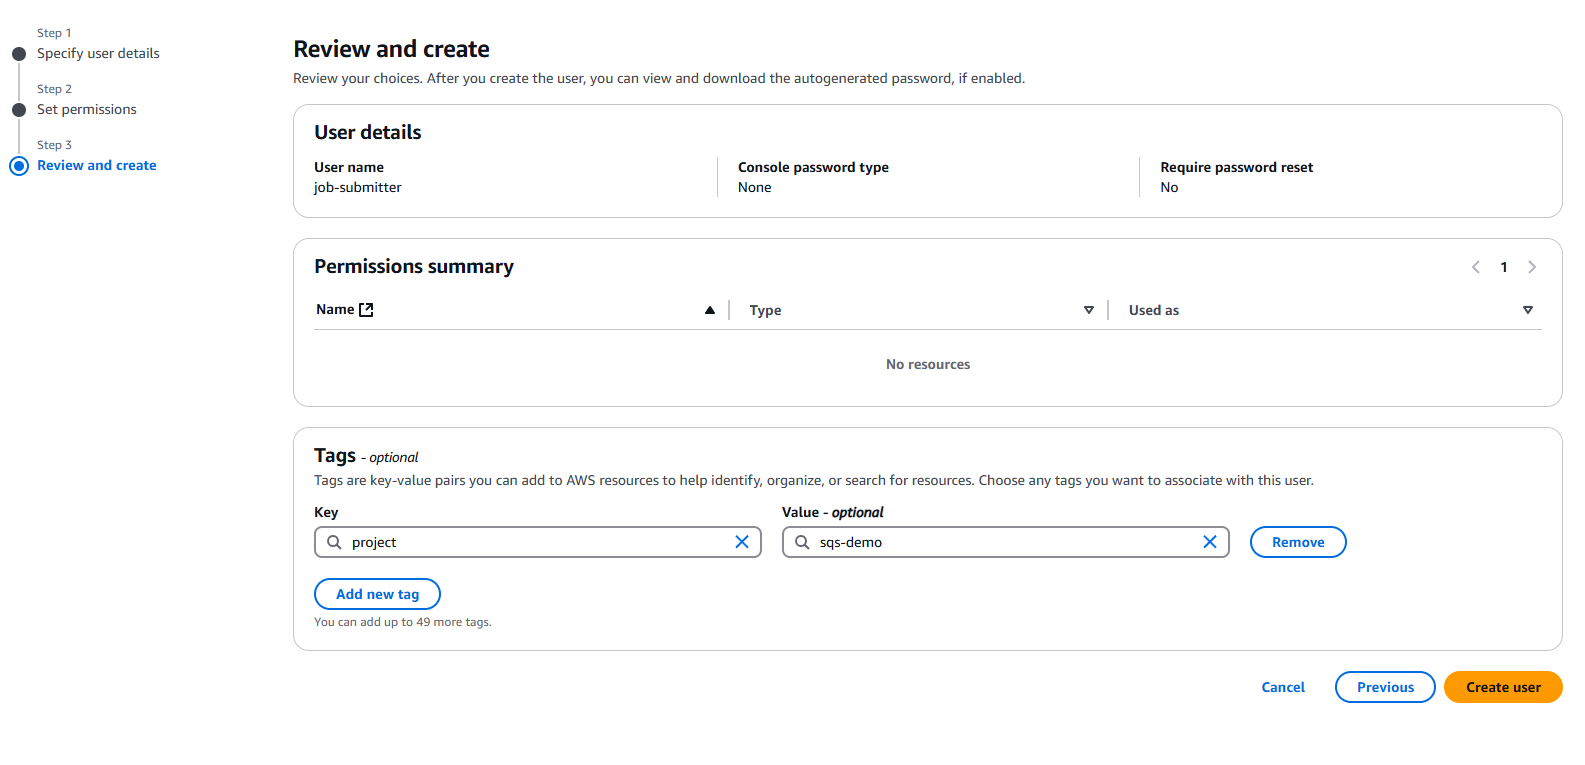
Tagging the job-submitter user
job-worker. Once you’re done, leave this tab open, because we will need
the resource IDs (ARNs) of the users later.
We need to create a set of access keys for both IAM users in AWS. Navigate back to your IAM console tab, and click on
the job-worker user. Select “Create access key”, and save the access keys and secret keys somewhere safe. Make sure to
keep track of which set of keys belongs to which user, since they have different permissions.

Creating an access key for the job-worker user
The Job Queue: SQS
Simple Queue Service, or SQS, is a fully managed serverless queue solution from AWS. It is a great choice for managing long-running tasks (but < 12 hours) on SaladCloud because it is highly available, scalable, and requires no ongoing maintenance. For tasks longer than 12 hours, the job will be processed no more than 12 hours at a time by any particular worker, and the job must be completed with 14 days of being submitted. SQS is not free, and while the pricing may seem low, the cost can add up quickly if you are not careful. That said, if you are processing less than a few million jobs per month, the cost should be negligible.Relevant Limitations
- Maximum message size of 256KB. This means if our job has much in the way of input data, we will need to store that input data in cloud storage, and only include references to it in the job definition.
- Maximum message retention of 14 days. This means if jobs sit in the queue for longer than 14 days, they will be automatically deleted.
- Maximum message visibility timeout of 12 hours. This means that if a worker does not delete a message from the queue within 12 hours of receiving it, the message will be made available to other workers. For some particularly long workloads, this presents challenges. For others, it is a non-issue.
- There is no built-in mechanism to look up what jobs are in the queue, or what jobs have finished. This means that if you need to know the status of a job, you will need to store that information somewhere in the cloud (database, bucket storage, etc), and update it as the job progresses.
- There is no built-in mechanism for canceling a job once submitted. If that is something you need, you would need to build an additional mechanism for it, and have your worker check for a cancel signal periodically.
- AWS is pretty complicated if you are unfamiliar with it (and even if you are!).
Creating SQS Queues
To create an SQS queue, navigate to the SQS console, and click “Create queue”.
The SQS Console
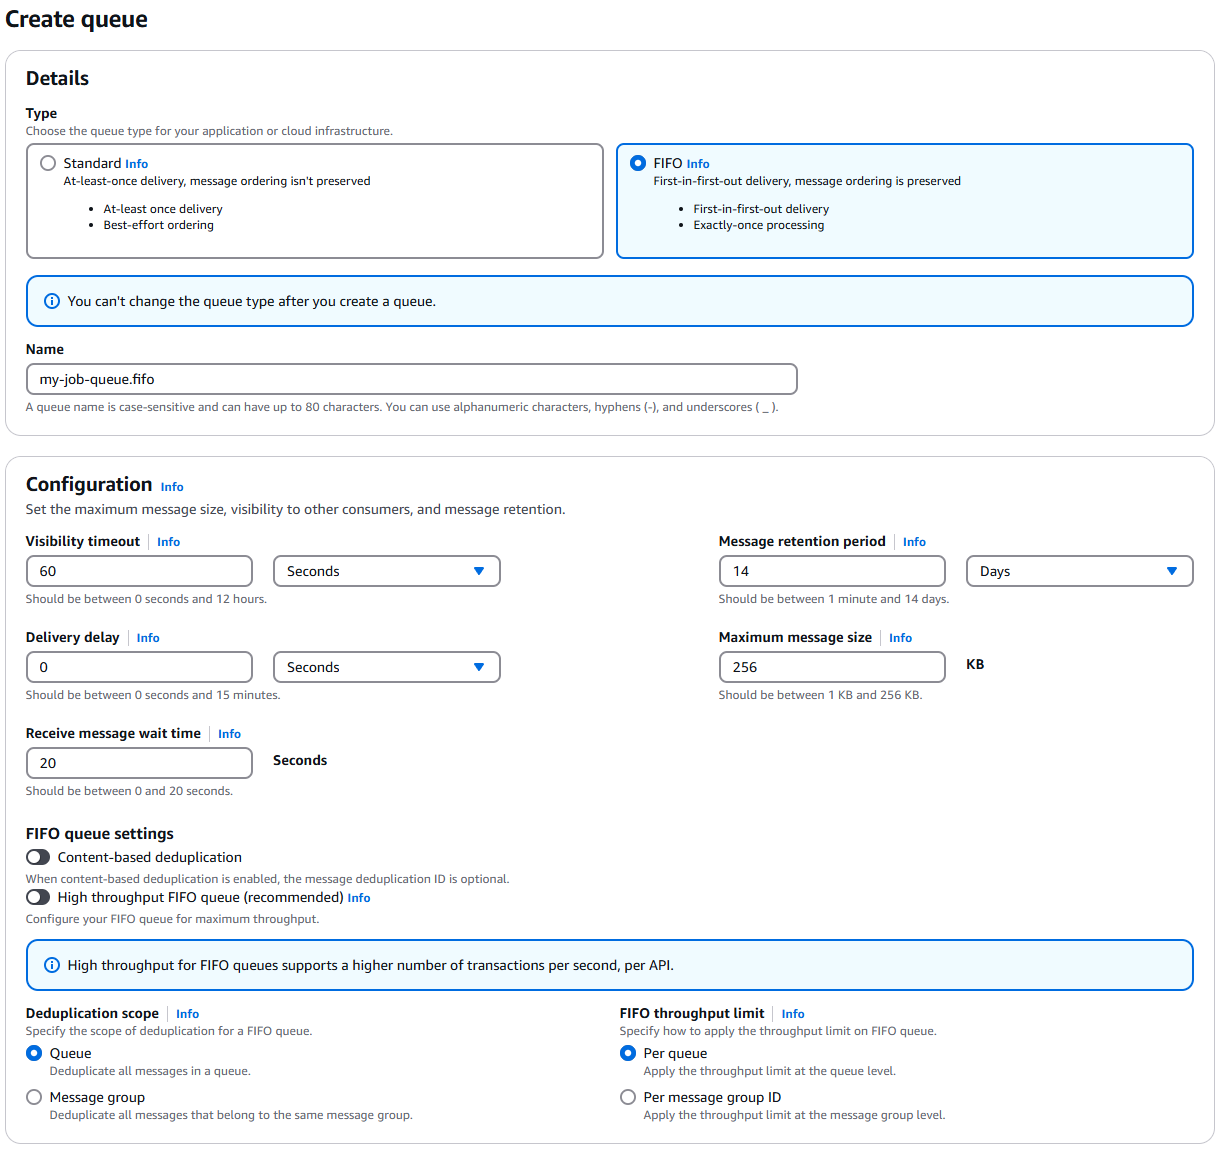
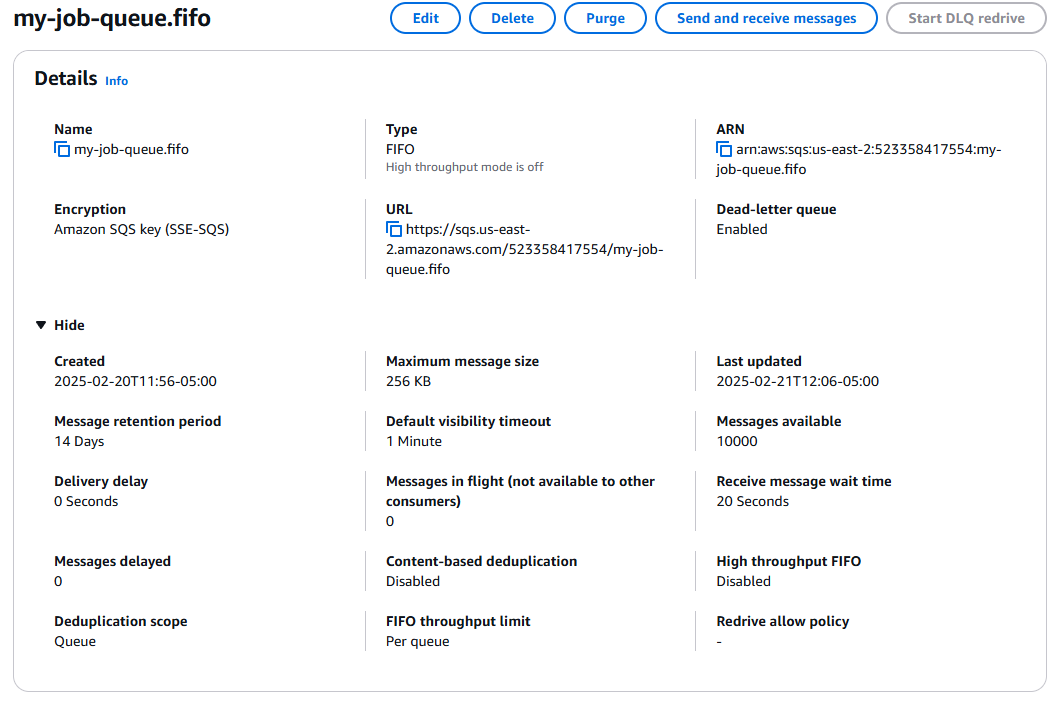
Creating a new FIFO queue
my-job-queue.fifo. The .fifo suffix indicates that this is a FIFO queue.
- FIFO queues are recommended for long-running tasks, because the cost of processing a job is often relatively high, and FIFO queues ensure exactly-once processing of each job. In non-FIFO queues, throughput is higher and the cost of jobs potentially being delivered more than once.
- Set the visibility timeout to 60 seconds. You might think, don’t we want it to be way longer than that? The answer is no, because we want the job queue to hand the job out to a new worker as soon as possible if a worker gets interrupted. In our application, we will programmatically extend the visibility timeout while the job is running. The 60 second value then becomes the maximum amount of time a worker can be out of communication before a job is handed out again.
- Set the message retention period to 14 days. This is the maximum value, and we want to keep jobs around as long as possible in case we need to reprocess them, or in case our we have a scenario with dramatically more jobs than workers.
- Set the default message delay to 0 seconds. This is the amount of time a message will sit in the queue before it is available to be picked up by a worker. We want this to be as low as possible, because we want workers to be able to pick up jobs as soon as they are available.
- Set maximum message size to 256KB. This is the maximum size of a message in the queue. If your job input is larger than this, you will need to store the job inputs in cloud storage, and only include a reference to the job in the message. An example would be dreambooth training, where many images are needed as an input to the job.
- Set the “Receive message wait time” to 20 seconds. In order to minimize the number of api requests (which are billed), we want workers to wait up to 20 seconds on an open connection for a job to become available. In times of high throughput, this setting doesn’t really matter because workers will always have a wait time of 0 seconds. however, in times of low job volume, this setting can lead to significant savings in billed api requests.
- Leave content-based deduplication disabled. We will be using the more lightweight
MessageDeduplicationIdfield to ensure exactly-once processing of jobs, and assigning GUIDs to jobs in our application code. - We want the deduplication scope to be queue-wide, so that we can ensure exactly-once processing of jobs across all workers.
- For “FIFO throughput limit”, we want to set this to “Per queue”. Selecting “Per message group ID” enables high-throughput FIFO queues, which are excessive for out application. If you are processing tens of thousands of simultaneous jobs, you may want to enable high-throughput FIFO queues, but for most applications, this is unnecessary.
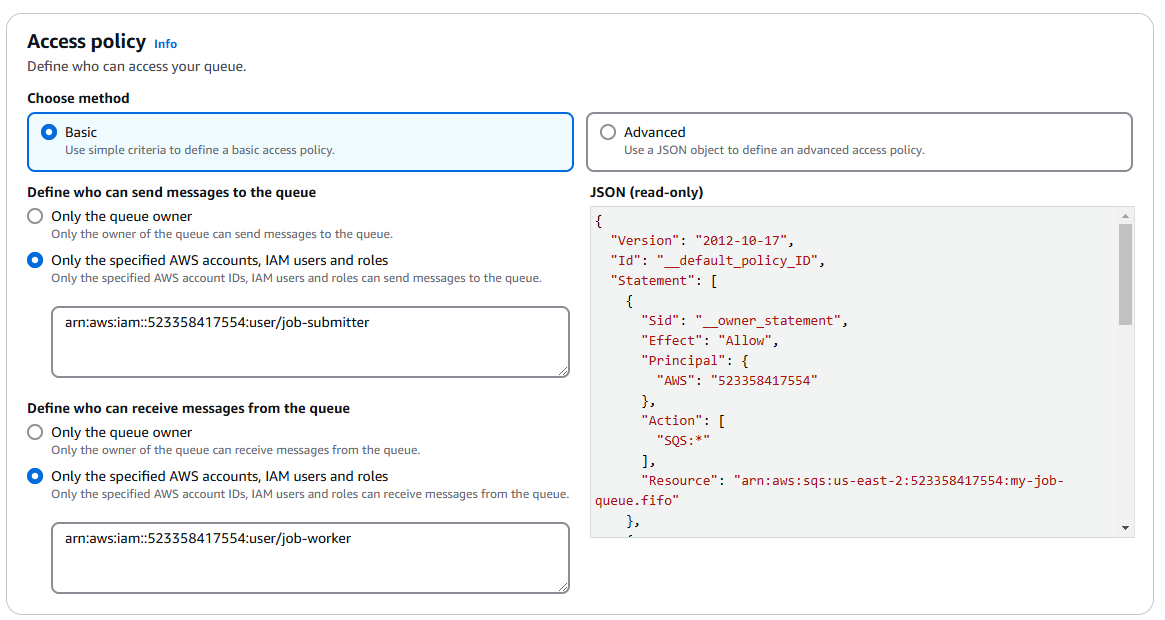
Assigning permissions to the users we previously created.
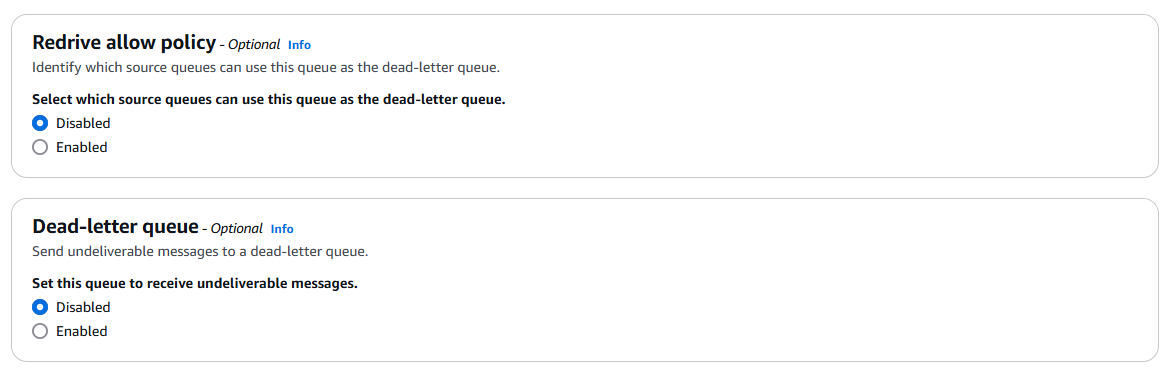
Skipping the dead-letter queue for now
my-job-queue-dlq.fifo, and set its
permissions to allow job-worker to send messages to it. For this one, we will enable “Redrive allow policy”, and
allow our first queue as the source queue.
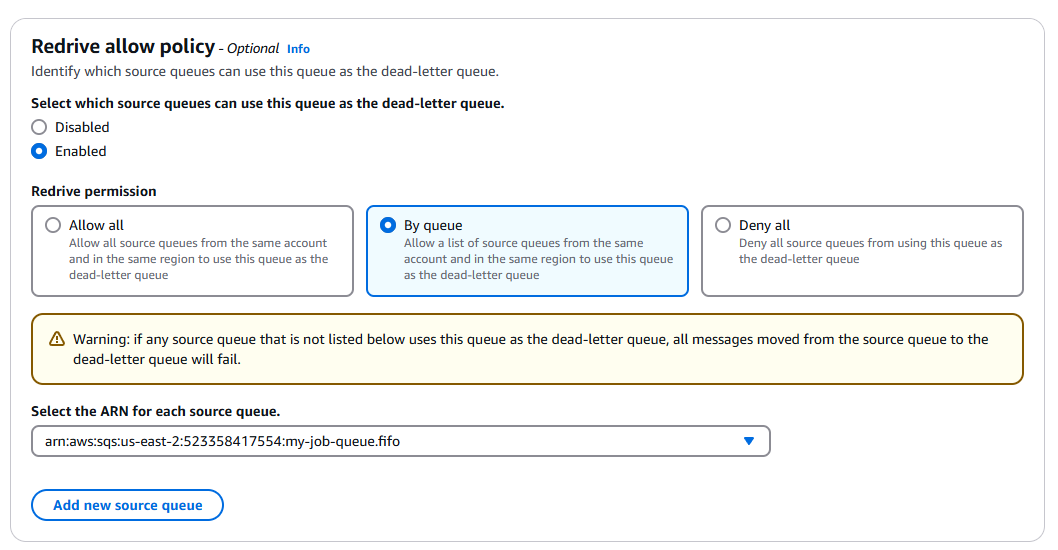
Enable access from our main queue to the dead-letter queue
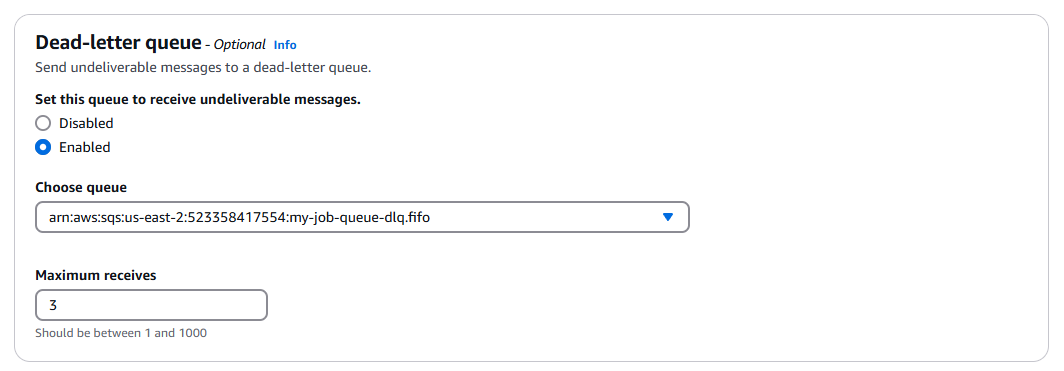
Enable the dead-letter queue on the main queue
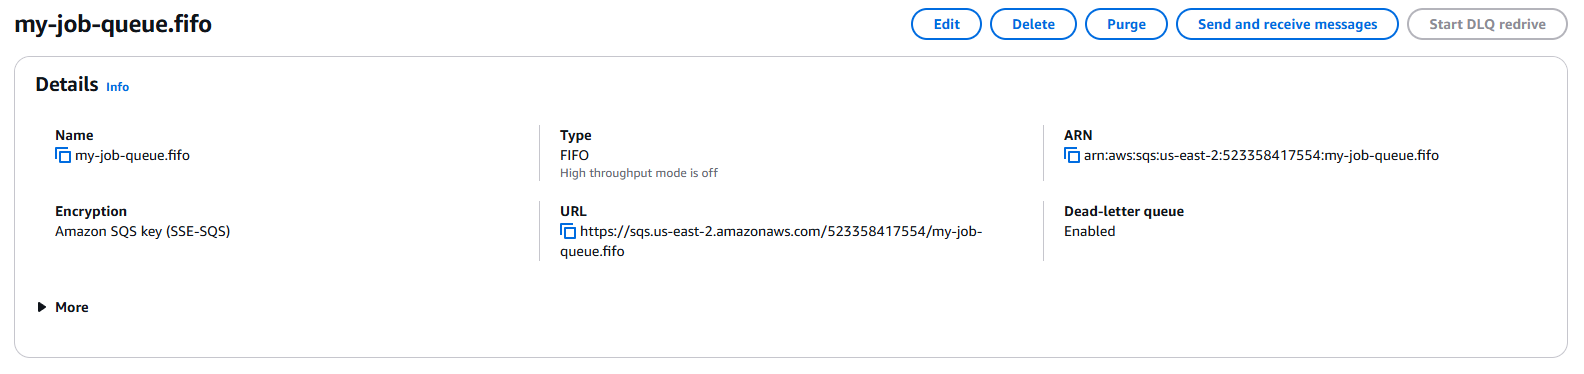
The Queue URL
Cloud Storage: R2
R2 is a cloud storage service from Cloudflare that is compatible with the S3 API. It is a great choice for SaladCloud workloads because it does not charge egress fees, and SaladCloud’s distributed nodes are mostly not in datacenters, and therefore may incur egress fees from other providers. From the R2 console, navigate to “R2 Object Storage”, and click “Create Bucket”.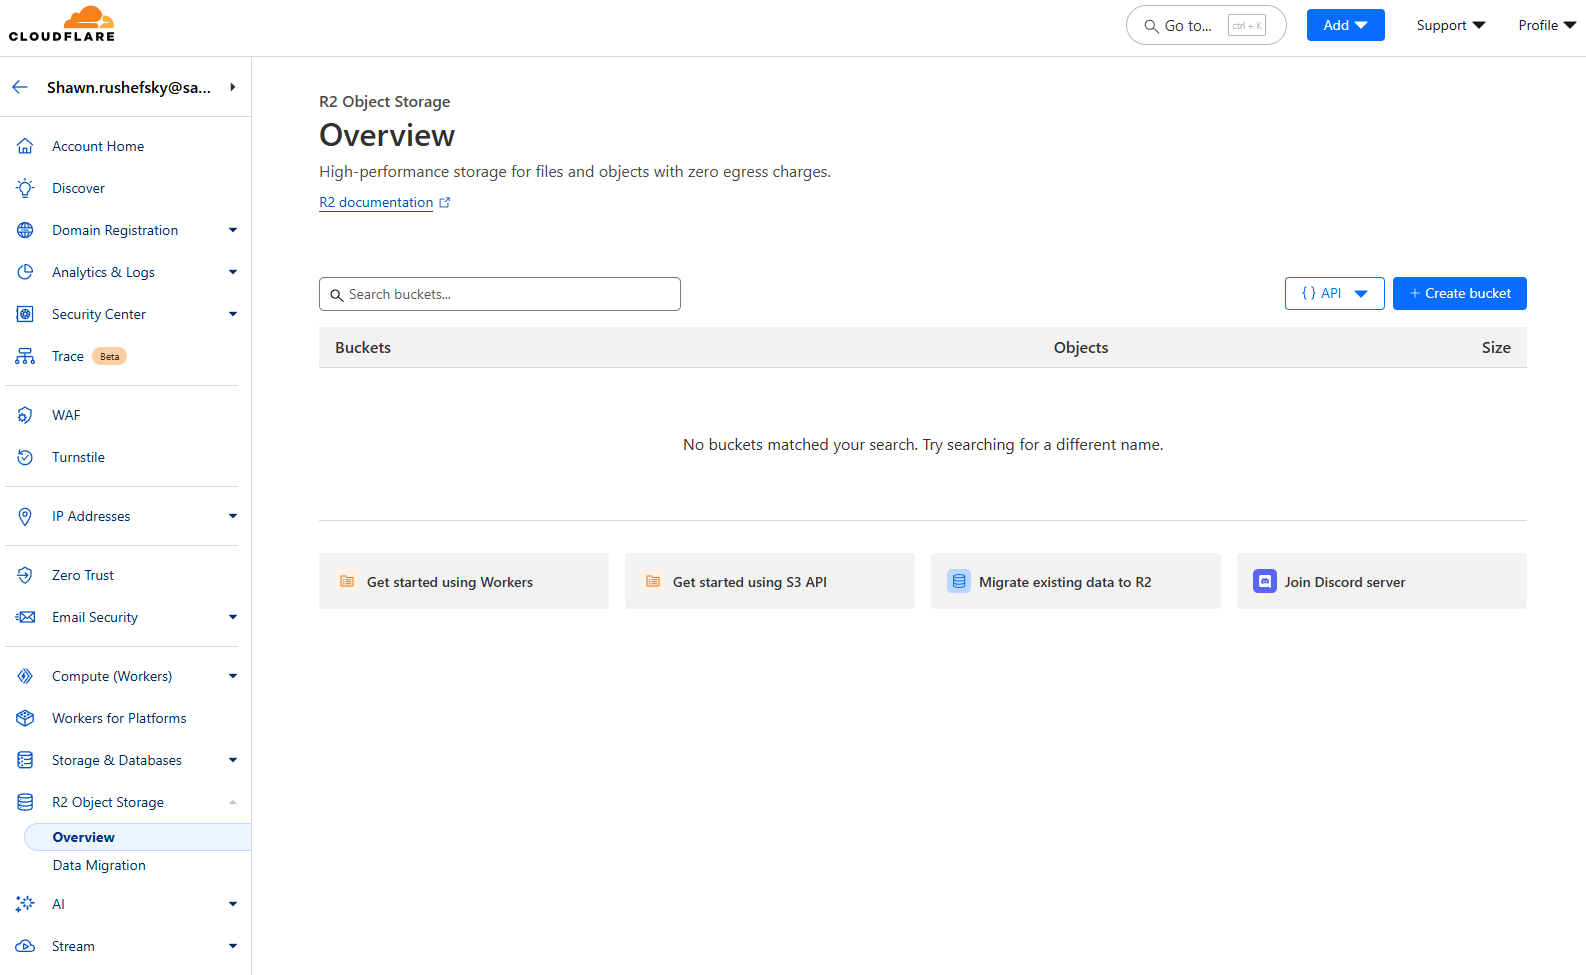
The R2 Object Storage Console
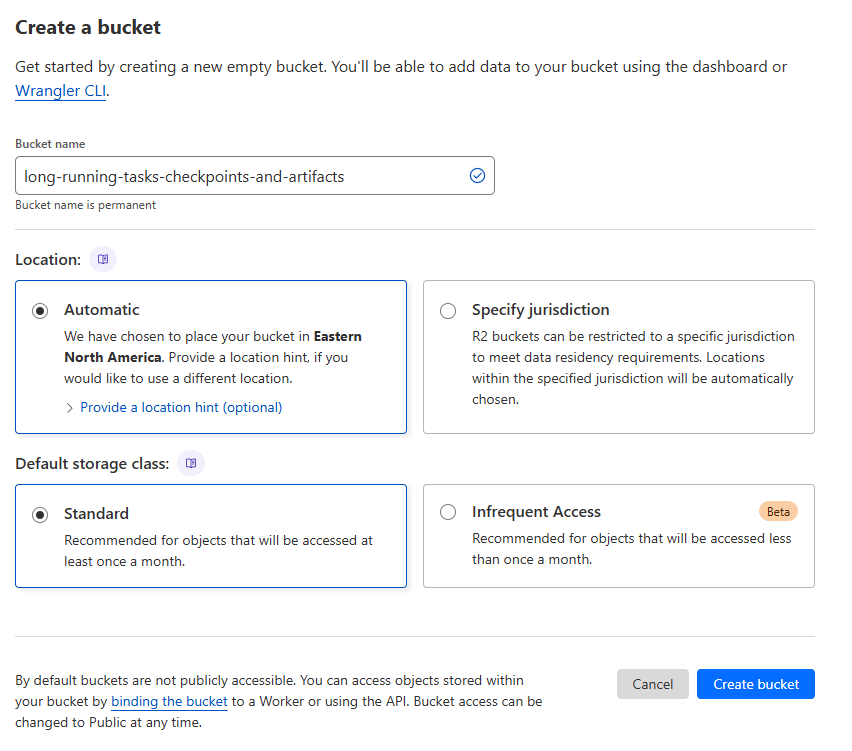
Creating a new bucket
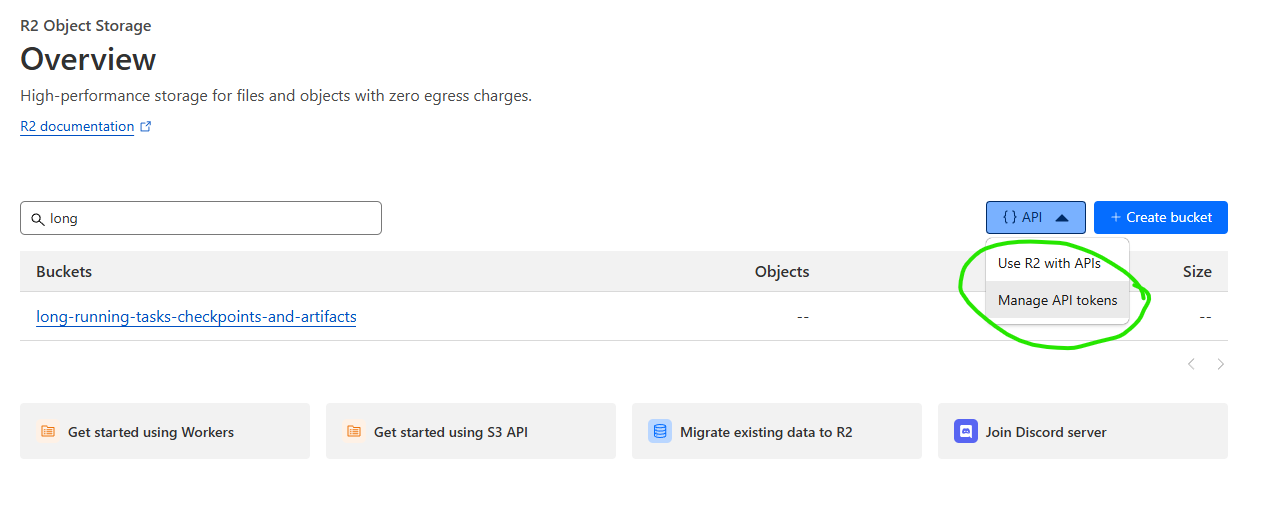
You still need an API token to access your bucket
Instrumenting Our Application
We’re going to use theboto3 library to interact with both SQS and R2. You can install it with pip install boto3.
First, we need to set up our environment variables. All of the following environment variables will be needed by the
application code.
There are several ways to do this, but what I’ve done for my development environment is create a file called
worker.env in the root of my project, and add the following lines:
*.env is in your .gitignore. You don’t want to commit your secrets to your repository.
Now, create a file called clients.py, and add the following code:
main.py, where we need to define functions for retrieving a job, for
extending the visibility timeout of a job, and for deleting a job. We also need to define a function for saving a
checkpoint to cloud storage, and for loading a checkpoint from cloud storage.
We’re going to need to import some things from our client file.
get_job function:
heartbeat_job function, that will extend the visibility timeout on a cadence, and can be interrupted
from a different thread. This function also needs to be able to stop the main job if the receipt handle is invalid,
which means the job has been acknowledged (finished), or the message has been given to another worker.
True if
the job is valid, and False if the job is invalid. In our case, we’re going to assume that any job with a job_id and
steps is valid, but your usecase is likely far more complex than that.
process_job.
Completed Example
python main.py. It will run forever, polling
the queue for jobs, and processing them as they come in.
Submitting Jobs to the Queue
Next, we need a way to submit jobs to the queue. We’re going to use theboto3 library for this as well, but we’ll be
using the AWS keys for the job-submitter user. I’ve saved mine in a file called submitter.env, and I’m going to
source them into my environment with the following command:
submit-jobs.py.
The first part should look familiar, getting config from the environment, and initializing our SQS client.
send_message_batch to maximize throughput, and we’re going to assign a MessageDeduplicationId to each job to ensure
exactly-once processing.
Completed Example
Running the Job Submitter
Run the job submitter withpython submit-jobs.py. It will read the csv file and submit all the jobs to the queue.
Once that has run, we can see in the SQS console that our queue has 10000 messages.
The SQS Console showing 10000 messages in the queue
Containerize the Worker Application
Now that we have our worker application and our job submitter, we can package our worker in a docker container, and run it on a SaladCloud Container Group. First, let’s make sure our dependencies are documented inrequirements.txt.
Dockerfile. Our application is simple, so a basic python base image should be fine.
Ctrl+C.
Now, we can push the image to Docker Hub.
Deploying the Worker to SaladCloud
To deploy our worker to SaladCloud, we need to create a new Container Group. This can be done via the API, SDKs, or the Portal. We’re going to use the Portal. We’re going to create a new Container Group, and we’re going to use the image we just pushed to Docker Hub. We’re going to request 100 replicas (the max via the portal), and we’re going to set all of our environment variables fromworker.env.

Creating a new Container Group
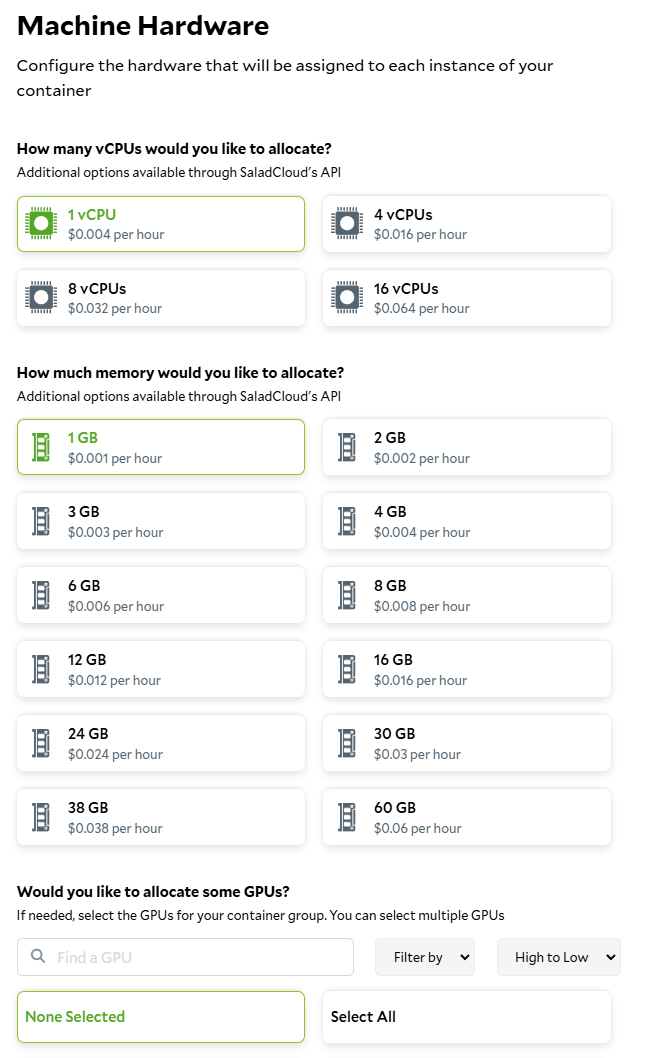
Setting the hardware requirements
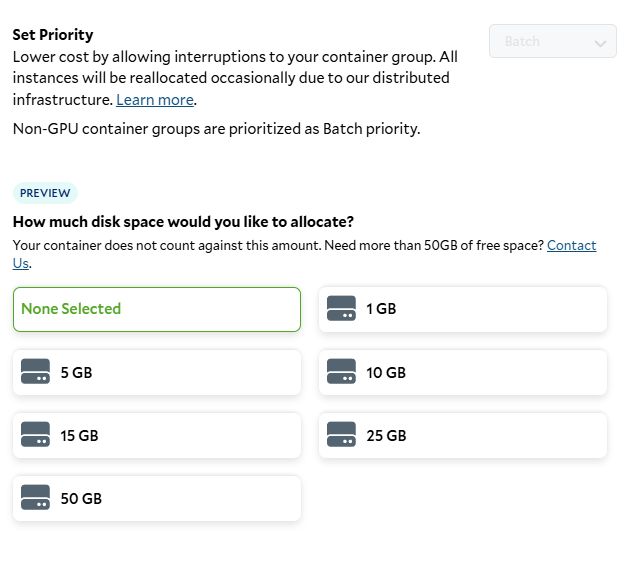
Setting the job priority and storage requirements
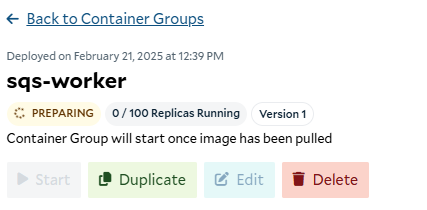
Preparing the container
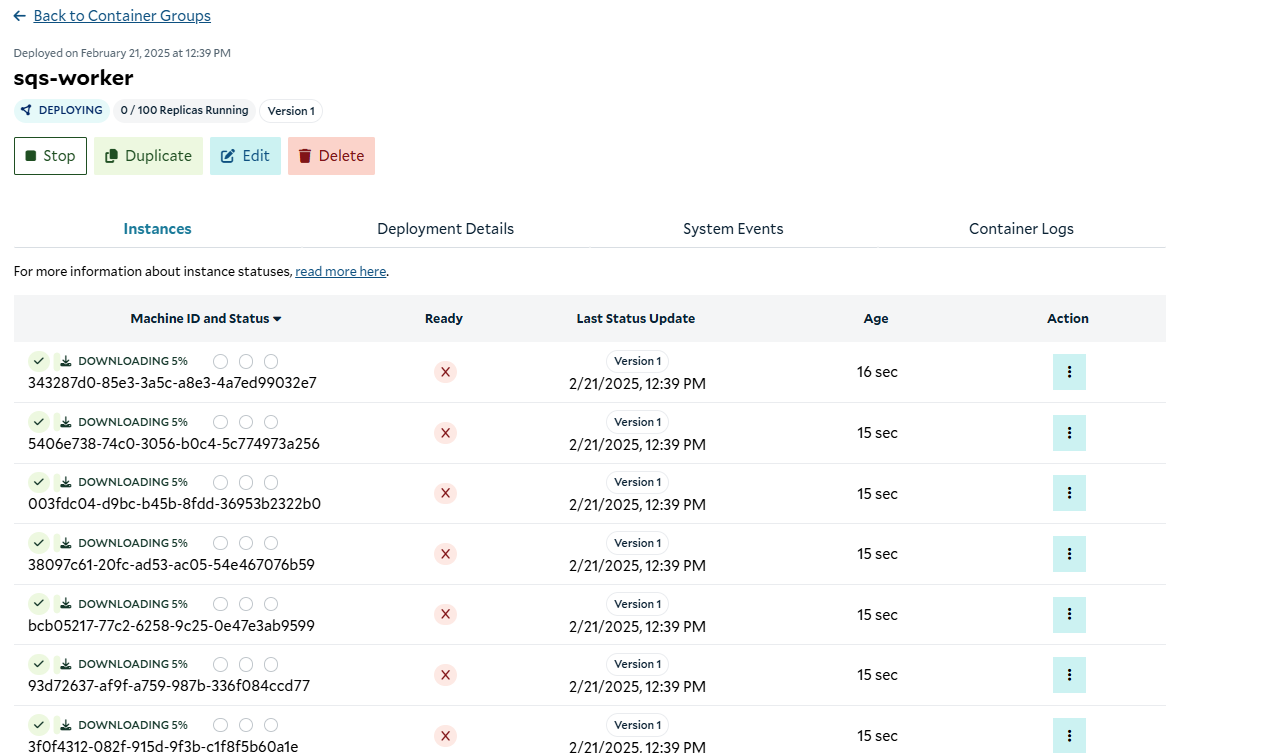
Downloading the images to the replicas
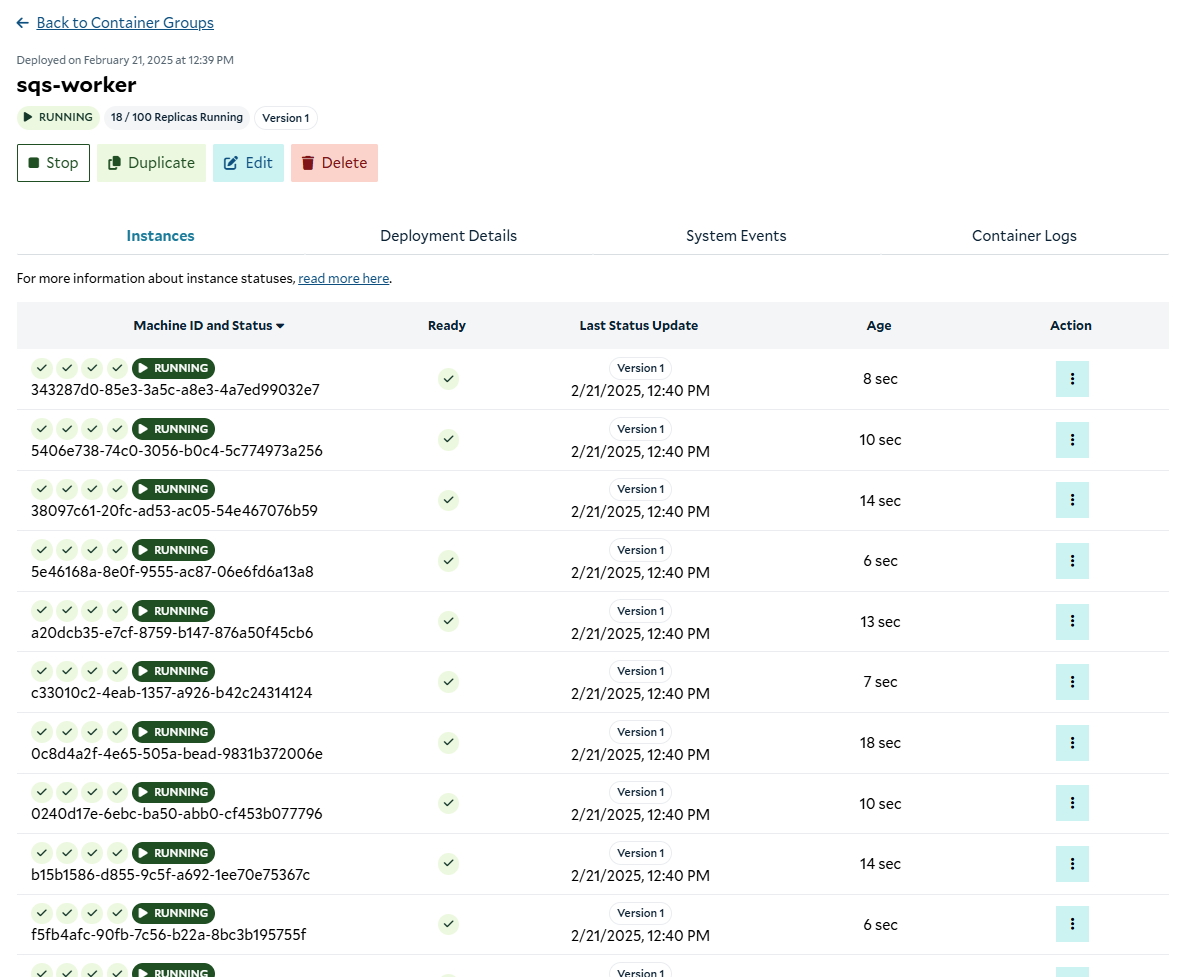
Instances up and running
Validating That It Works
Now that our cluster is up and running, we can go to the SQS console, and see that we have in-flight messages now.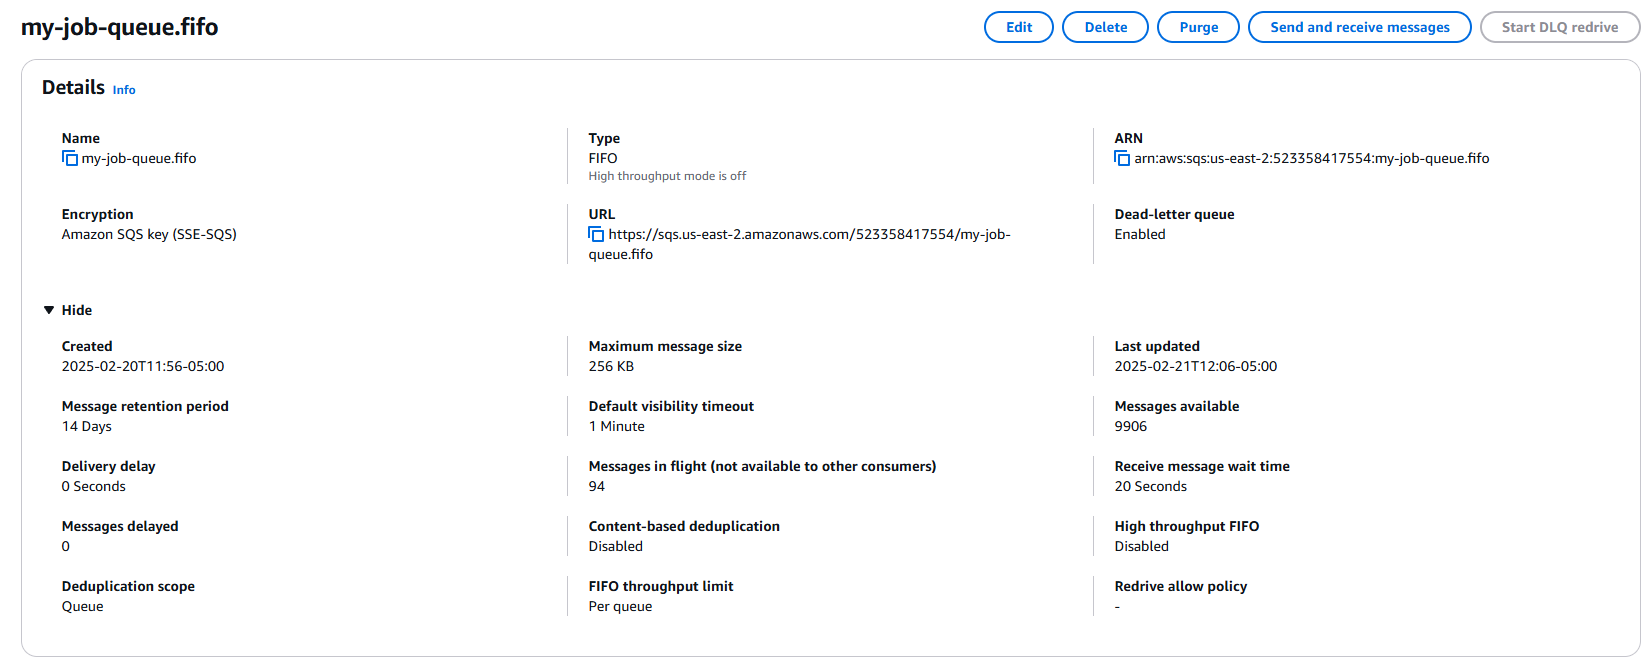
In-flight messages in the SQS queue
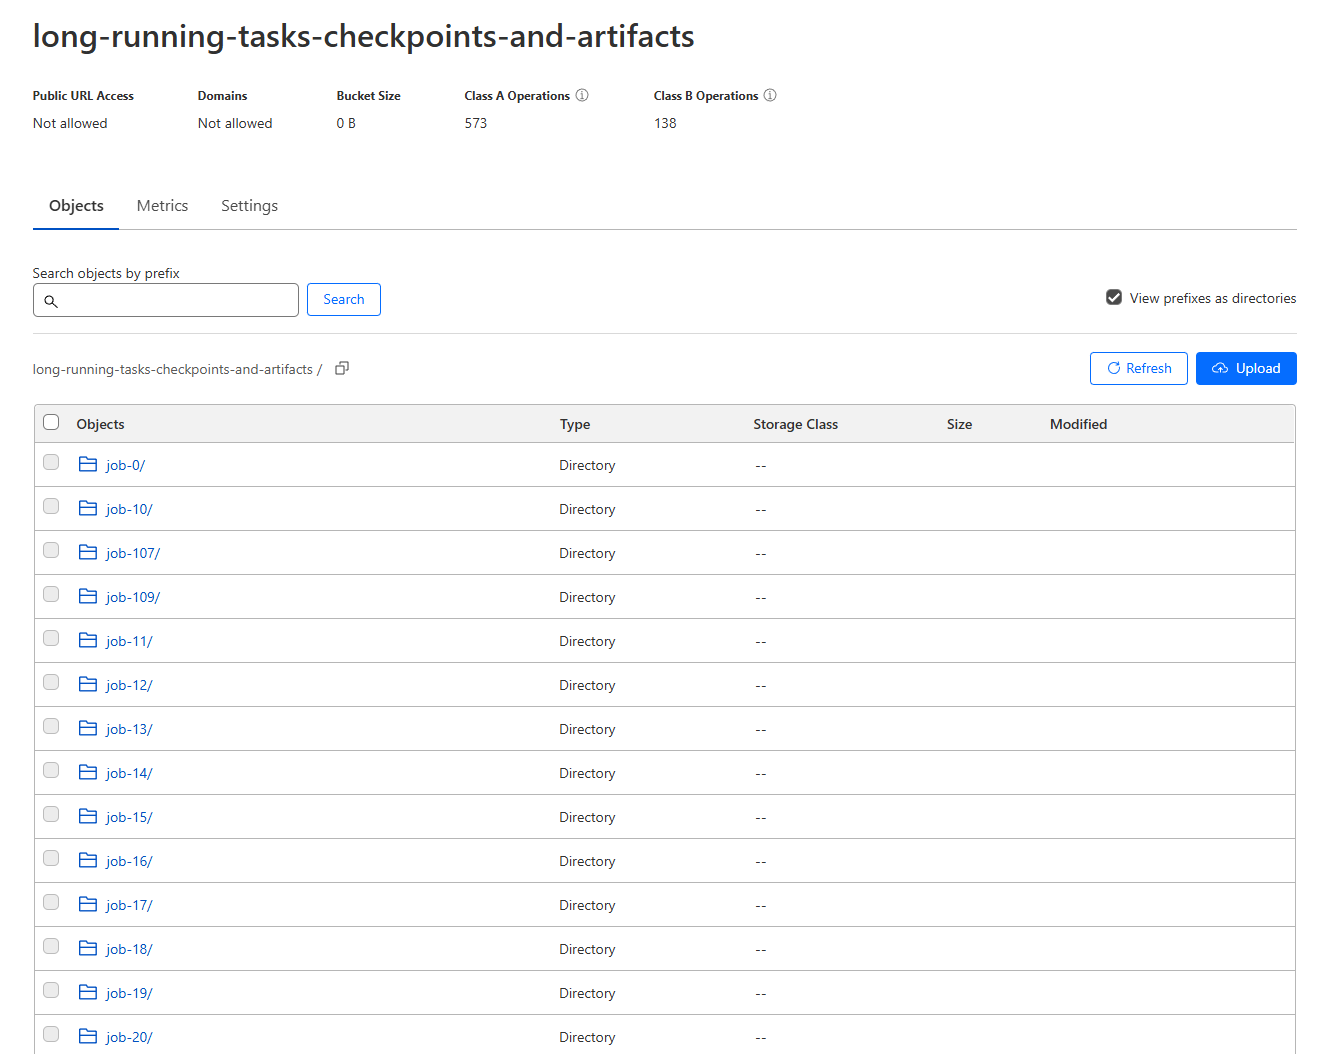
Checkpoints and results in the R2 bucket
Autoscaling
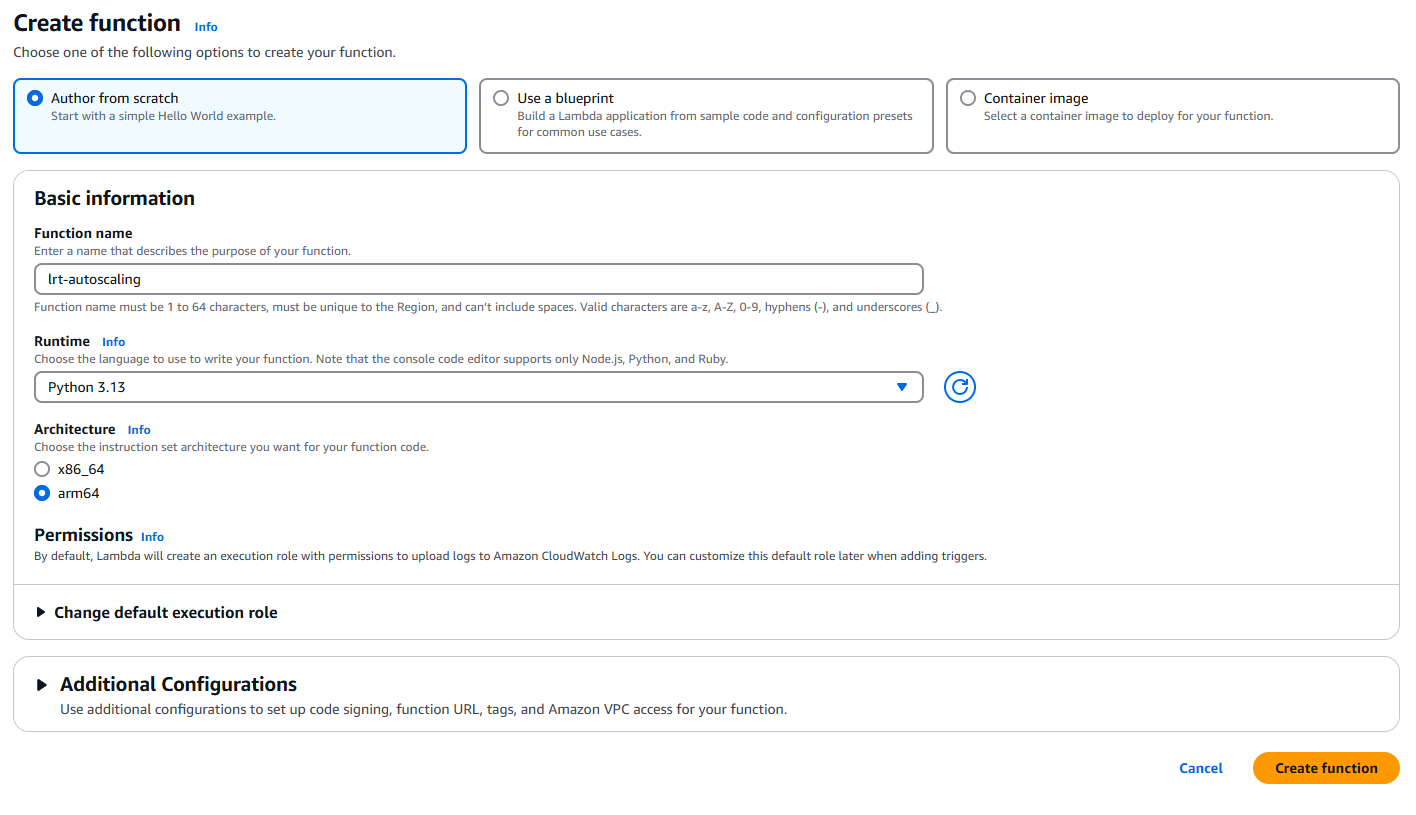
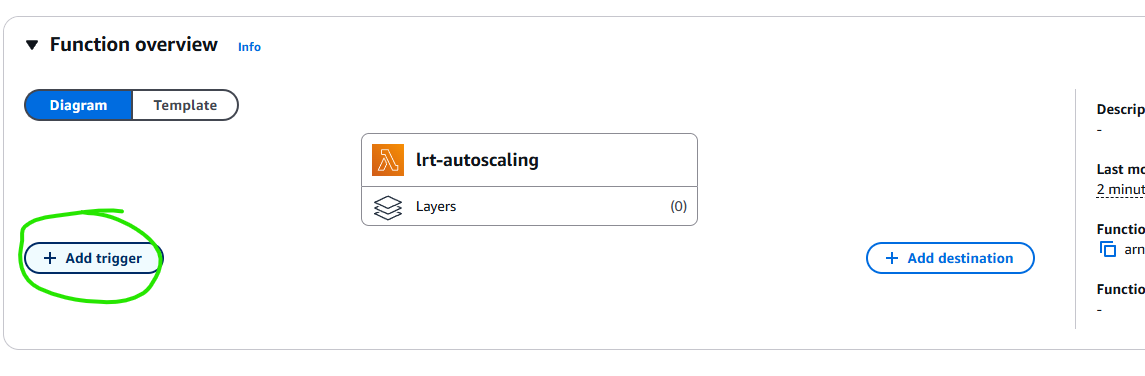
Now that we have our worker running, we can set up some simple autoscaling to automatically scale the number of replicas up and down based on the number of messages in the queue. There are many ways to implement autoscaling, but for simplicity, we are going to use a scheduled task that runs every 5 minutes, and sets the number of replicas to be equal to the number of messages in the queue, limited to 250 replicas (the maximum in the API). To implement this, we’re going to use AWS Lambda, a serverless compute service that can run code in response to events. Cloudflare Workers can also be used to implement this, along with most other serverless compute platforms. Navigate to the Lambda console, and create a new function.
Creating a new Lambda function
arm64, because it is cheaper, and we aren’t doing anything
architecture-specific. We can leave the default permissions for now.
Setting the runtime and architecture
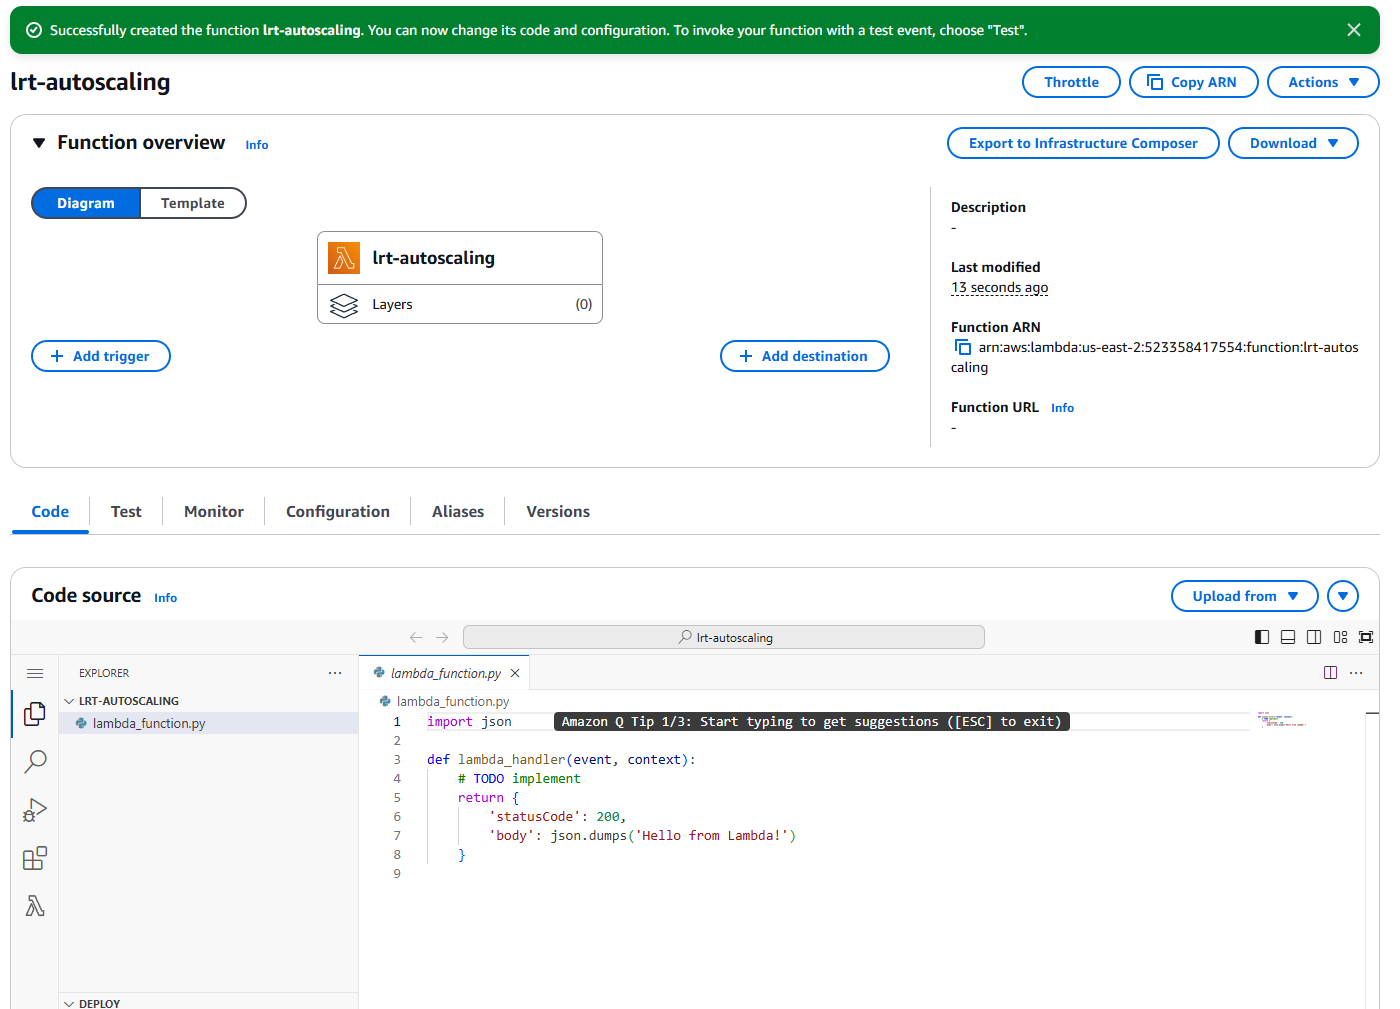
The function overview page
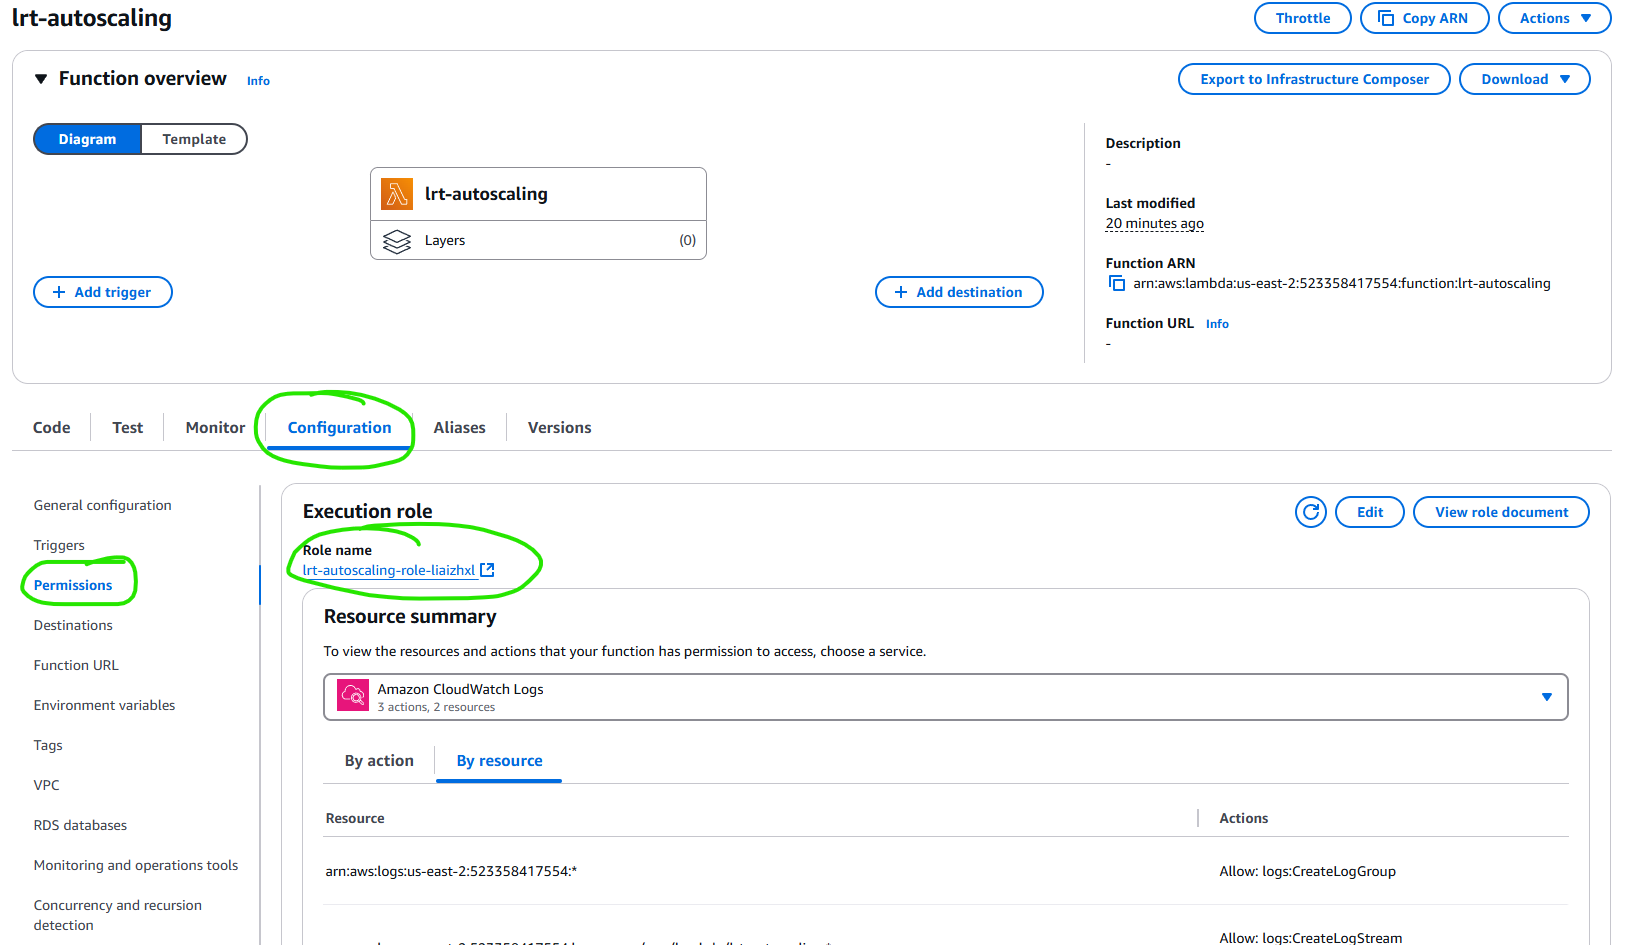
Find The Execution Role

The ARN of the execution role
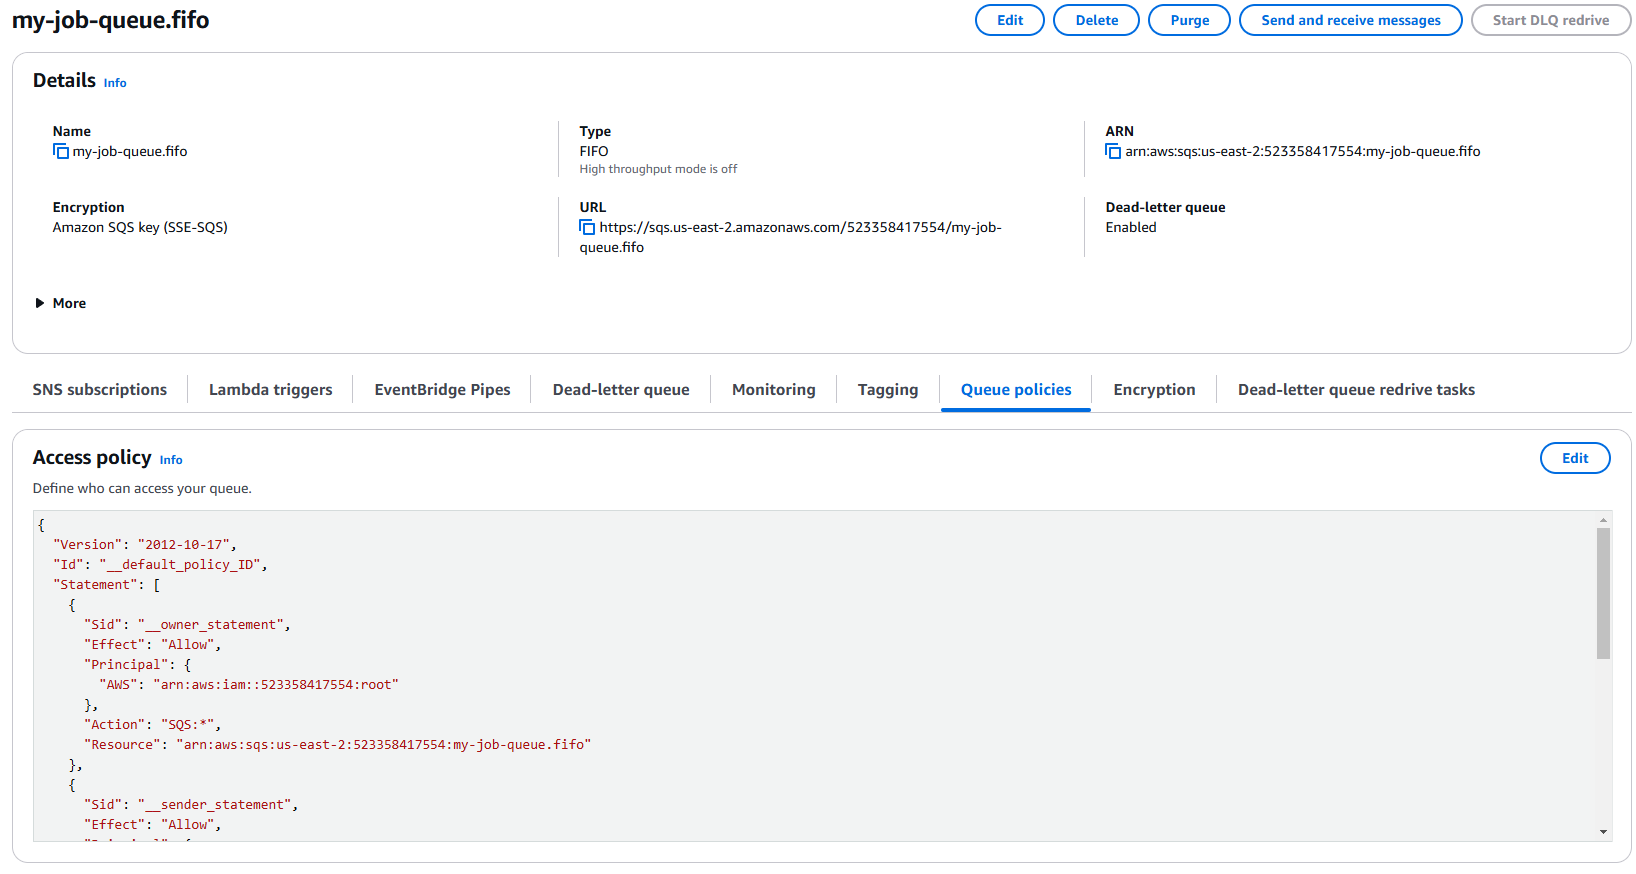
The Queue Policies tab
boto3 library to interact with the SQS queue,
which in included by default in the lambda environment.
We will be setting our configuration for this lambda in environment variables. You can find this under configuration on
the lambda console page for our function. Alsol in configuration, we want to increase our function timeout to 10s, since
we have to make multiple serial requests to external services.
Testing the Lambda
Creating a new CloudWatch Event
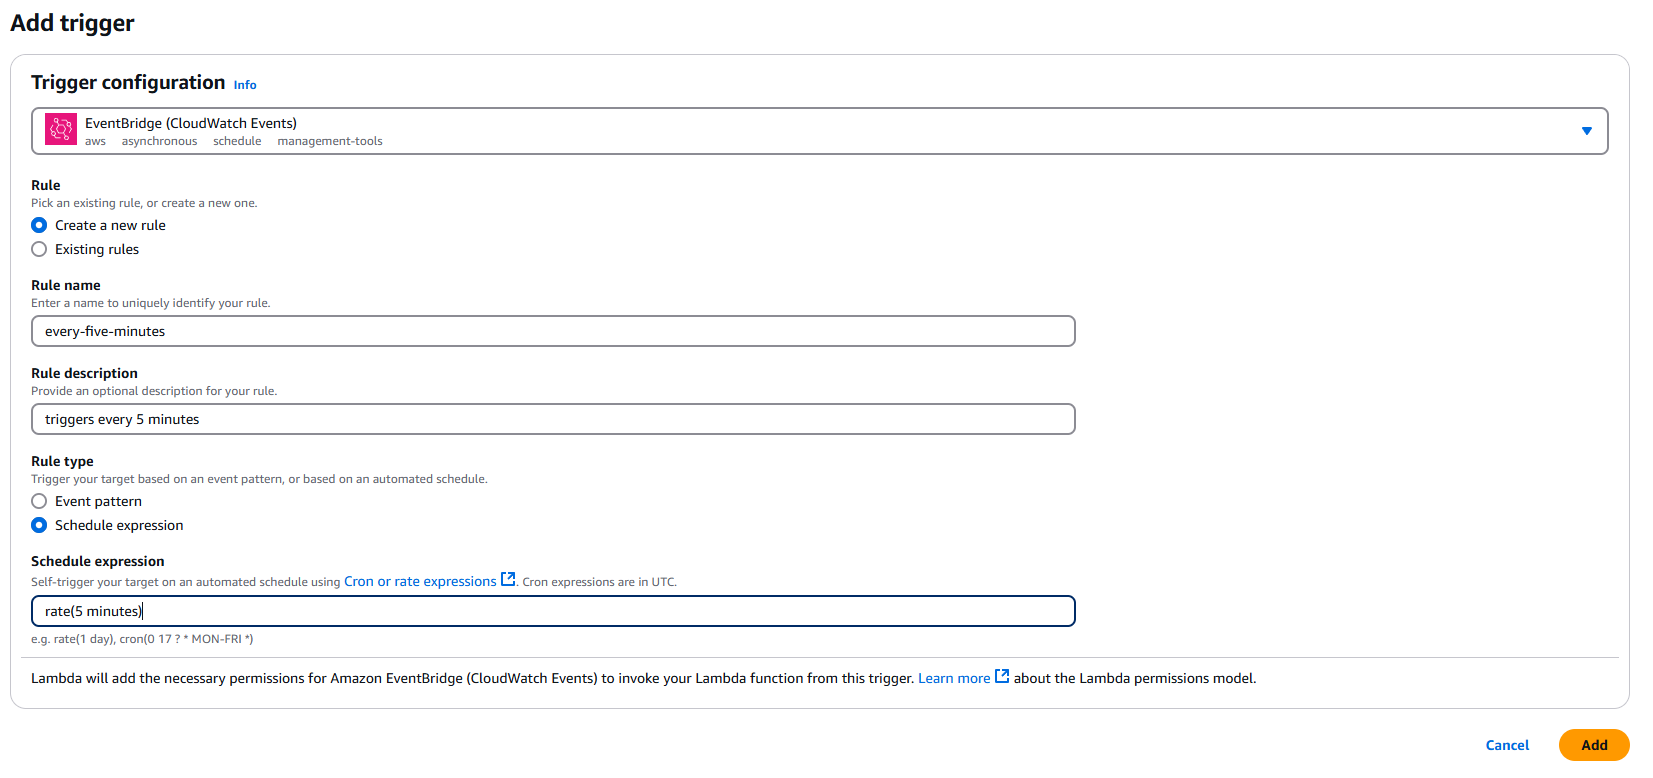
Setting the schedule